Calling all essential oil lovers! This do-it-yourself wooden essential oil holder has got your name written all over it!
The essential oil craze has sky rocketed over the past couple of years and with good reason. People have been gravitating towards aromatherapy methods over medication to relieve stress and anxiety, headaches and muscle pain, motion sickness and even to help boost the immune system. I recently started diffusing lavender oil before bed and I find I sleep much deeper with it. Everyone reacts differently to scents and that’s what I find so fascinating about essential oils.
In this do-it-yourself project, you will learn how to create your own wooden rustic essential oil holder to display all of your favourite essential oils.
What You Will Need:
Log with bark or Circular piece of wood – 1 log will make a few essential oil holders
Chainsaw – To cut the log
Drill
1” & 1-1/4” Spade Bits – Mine were from Home Depot
Sandpaper/Sander
Pencil/Chalk – I recommend using Chalk
Ruler/Measuring Tape
Paper
Polycrylic/Clear Coat – I used Minwax Polycrylic protective finish in clear satin
Step 1: Cut The Wooden Log
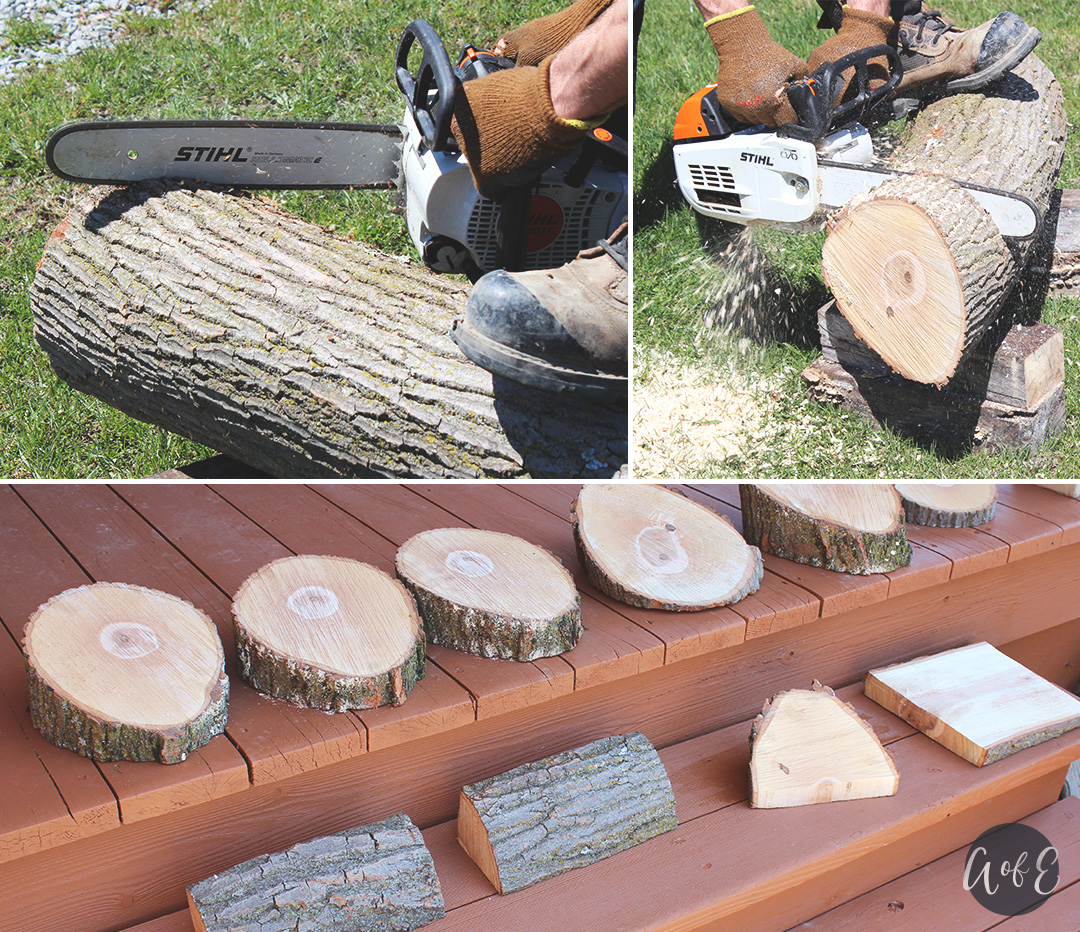
Using a chainsaw, or another form of saw, cut your wooden log into rounds. If you have a full wooden log at your disposal, I would suggest cutting multiple rounds so you have something nice to choose from. The first cut is not always the best; I found that the cuts closer to the middle of the log had the best bark texture. When cutting the log, cut on a slight angle so your essential oils will be displayed on an incline. If you cut the log straight you will have a flat base to place your essential oils on rather than an inclined display. I think the incline display looks nicer because you can read all of the labels on your oils much easier.
Step 2: Mark Drill Holes
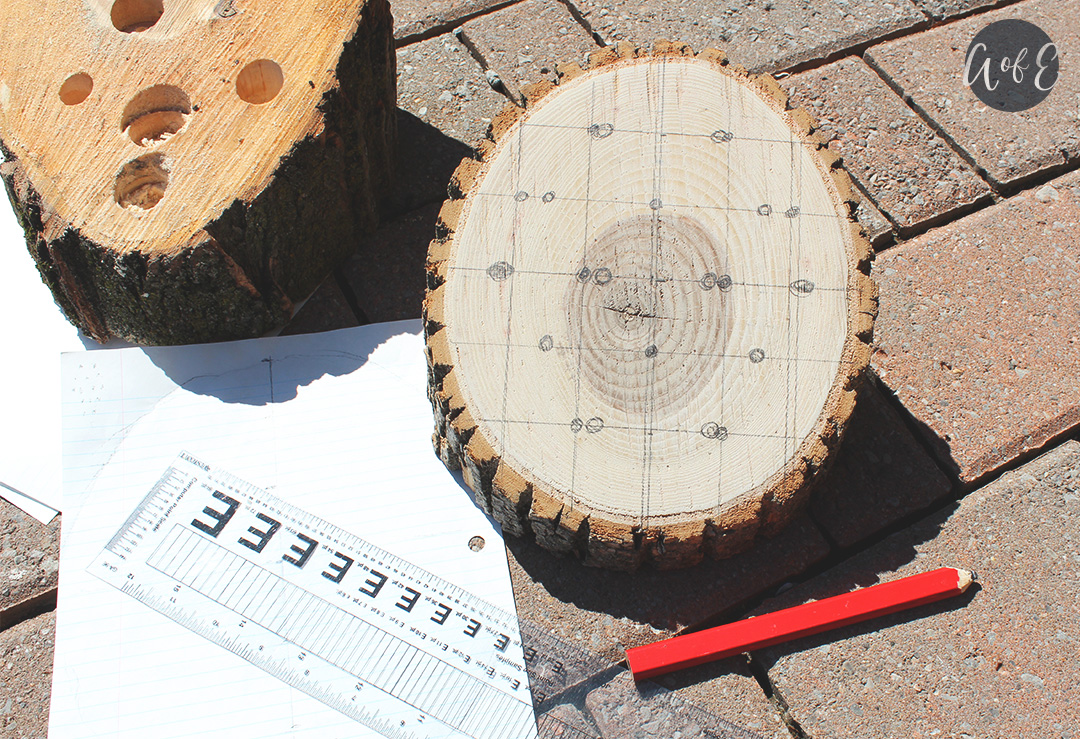
Using a ruler or freehand, find the center of your wooden holder. Once you have found the middle, draw a line horizontally and vertically from it. Draw more lines to divide your holder into a grid like pattern (see image below). This should help you navigate where to put pencil/chalk markings for the drill. My log held 14 essential oils nicely, yours might hold more or less depending on the size of the log. Use your essential oils as a guide to see how many will fit nicely.
I HIGHLY recommend using chalk for this step! I used pencil, which caused more work for myself later when I had to sand off all the excess pencil markings.
Step 3: Drill Holes
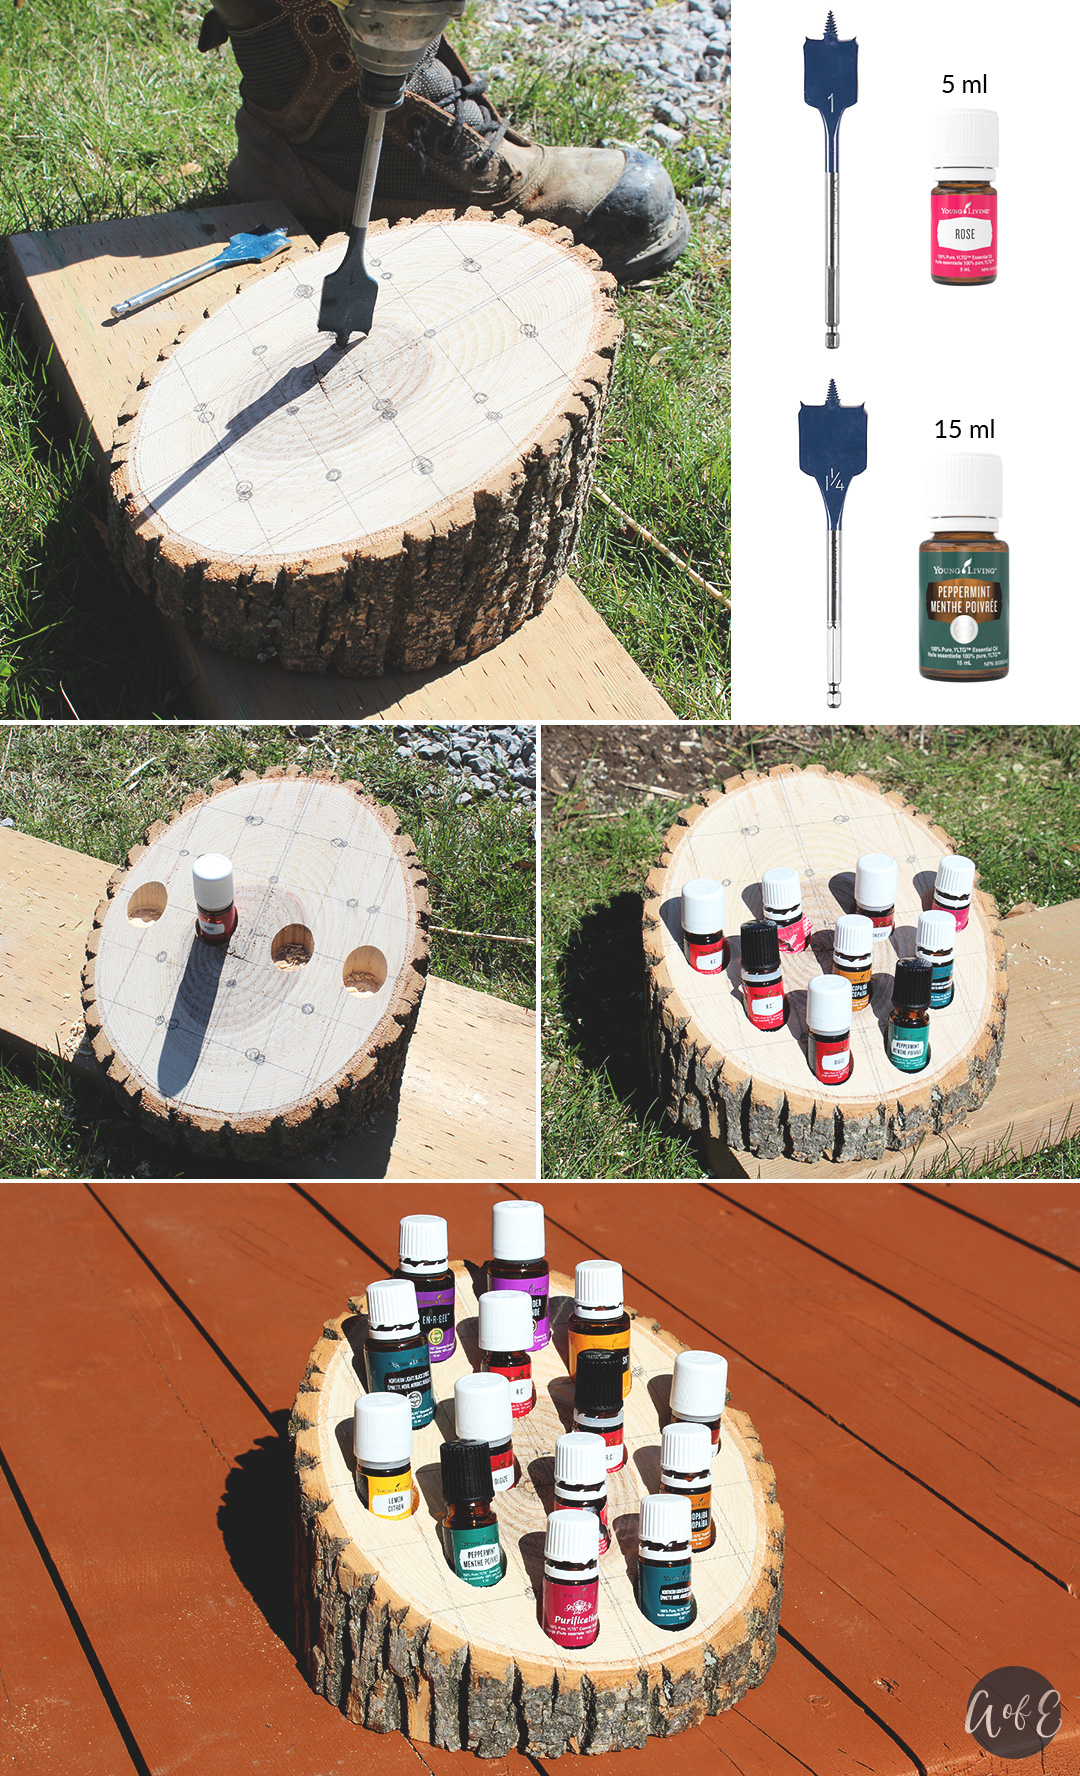
Choose your spade bit and drill your holes. I have a couple larger essential oils so I decided to make a holder that would fit all my oils nicely. The bottom 9 holes I drilled using a 1” spade bit and the top 5 holes I drilled with a 1-1/4” spade bit. You can choose which size works best for your oils. If you have a spare piece of wood lying around, I recommend some practice drills first. You want the essential oils to fit snug in the holes, not too big that the essential oils will move around.
Don’t start by drilling at the top or bottom of your holder! This is important! Always start from the middle and work down or up. Your pencil/chalk markings should only be used as a guide. I found that I often changed the positioning of the drilled hole based on how the last hole turned out, or if I wanted to add more space between the holes. Even though your wooden holder is slanted, drill straight. This will create a nice little seat for your oils. Once you have drilled the middle line of holes, drill the remaining holes.
Step 4: Sand Essential Oil Holder
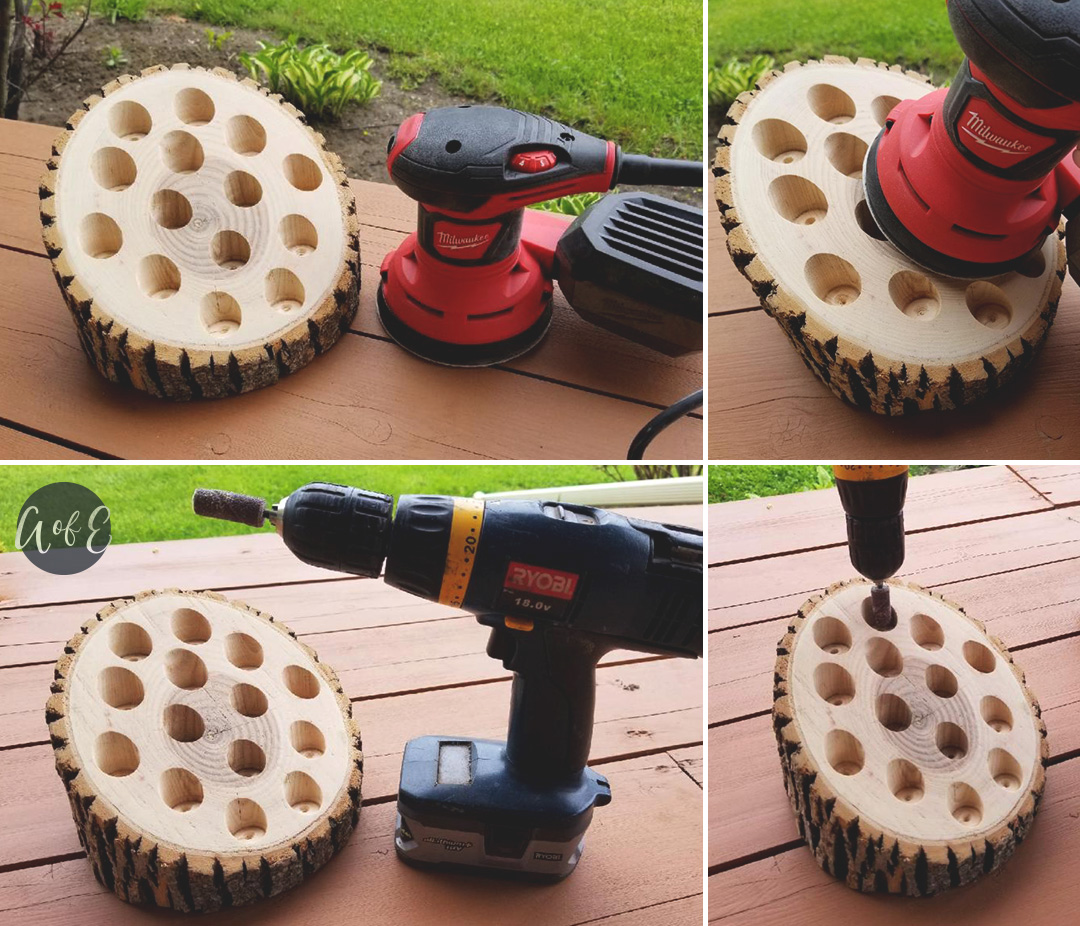
Sand your essential oil holder using an electric palm sander or regular sandpaper. Start by sanding the drilled holes. You can use a drill with a sandpaper attachment for this or simply roll the sandpaper into a circular tube for the holes. Sand the face of the essential oil holder smooth and remove any pencil/chalk markings you might have from the previous step. Try not to knick the natural bark on the sides.
Step 5: Let Wooden Essential Oil Holder Dry
Chances are your wooden holder will be wet from the cut. It might not feel wet, but it is a good idea to let the wooden holder sit in a climate-controlled area for about a week. This protects the bark and potential mold from growing or discolouring your holder. Do not leave it out in the sun or in a cold room. Dramatic temperatures can cause the wood to split or bark to fall off.
Step 6: Apply a Clear Coat
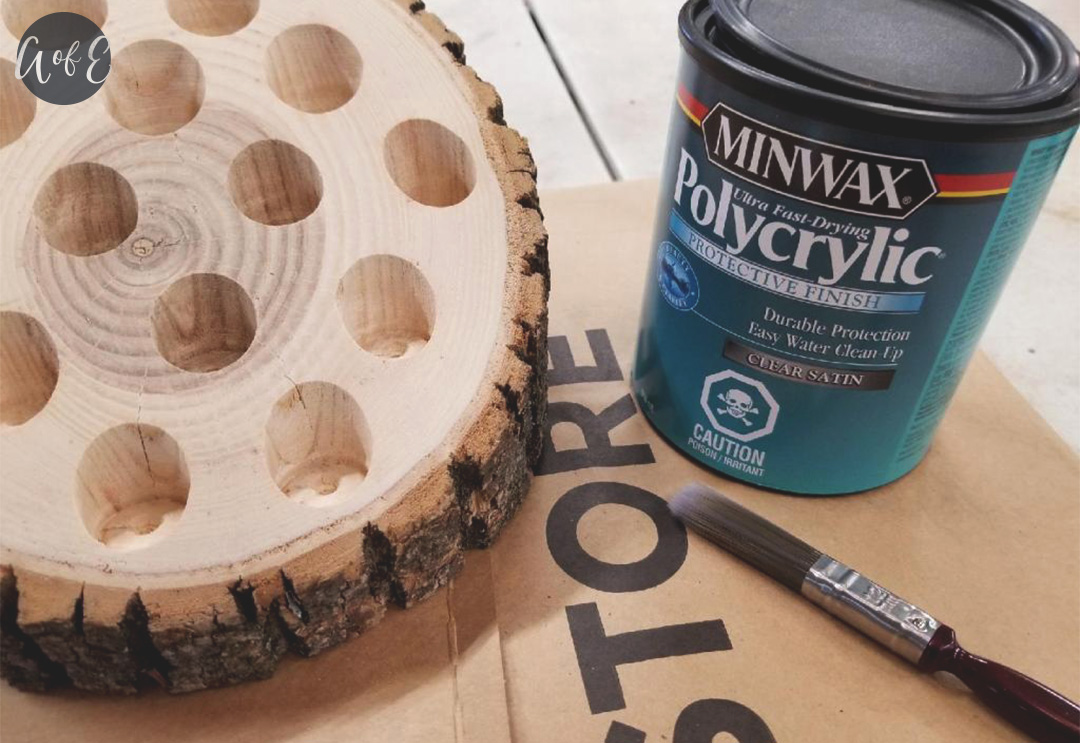
When your holder is dry, apply a clear coat. Choose a clear coat for outdoors or something with durable protection. A stronger clear coat will protect the bark from falling off. I used Minwax Polycrylic protective finish in clear satin. You can purchase it at almost any hardware store like Home Hardware or Home Depot. Apply the clear coat in thin layers and allow to fully dry before applying another coat. I applied about 3-4 coats.
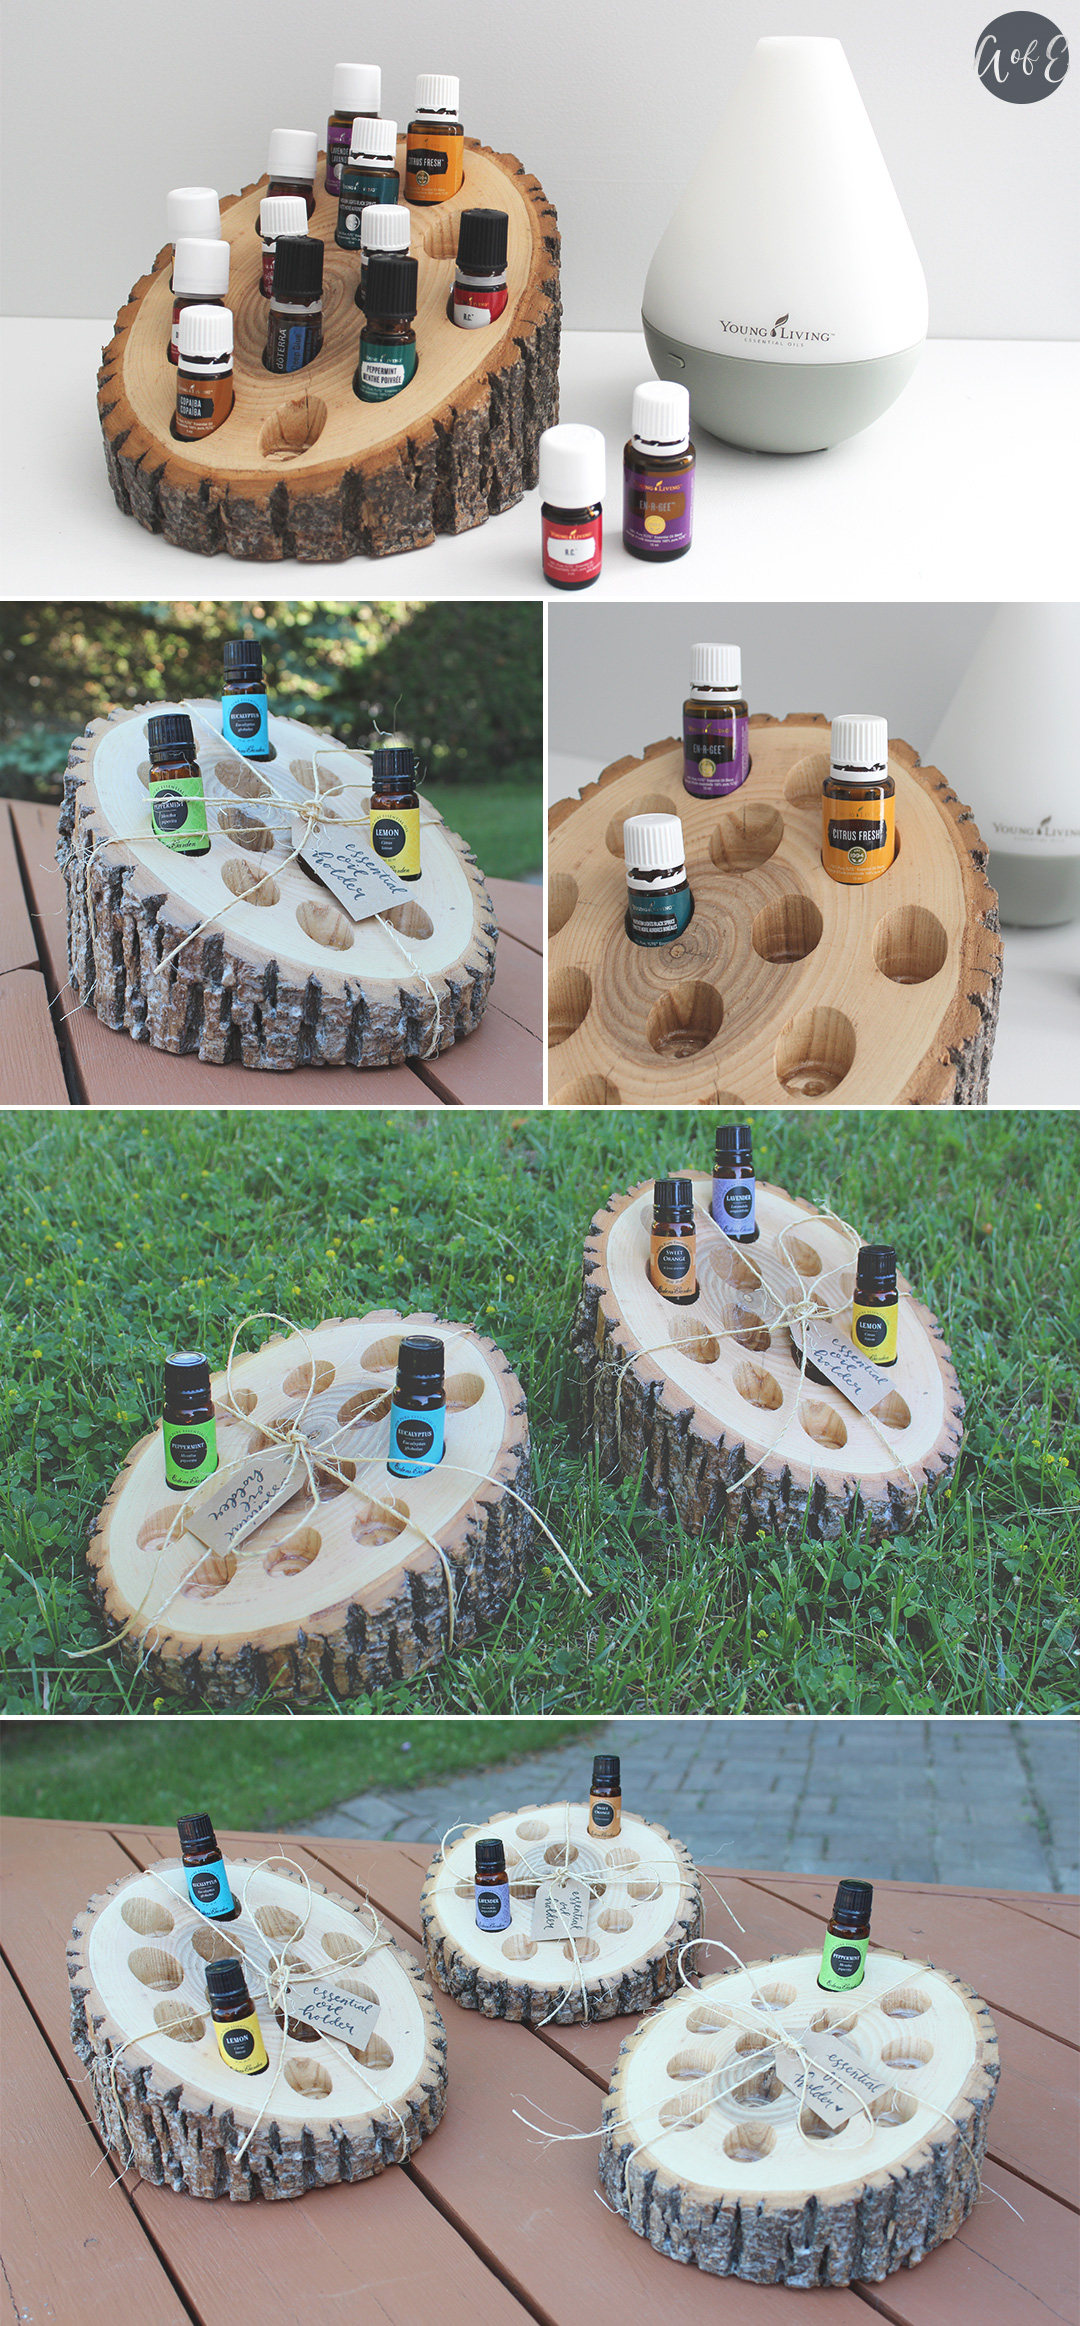
There you have it, your very own wooden rustic essential oil holder. Doesn’t it look lovely!?


4 Comments
Your awesome girl!!!! Love this idea.. I’m going to try and make me one maybe 4. Thank you!!
Ekk! So happy you love it! 🙂
What kind of food was this
Hi Summer! The wood I used was white ash. It dried nicely!