Do it yourself Grapevine ball light fixture
I’m a sucker for anything rustic looking. With the summer weather coming, I’ve been seeing a lot of people post about how to spice up your outdoor living area with a bang for your buck. I’d have to say grapevine balls are by far my favourite idea! Hang a couple of those with lights in a tree and you’ve officially set the mood for any night owl. I loved the idea so much that I decided to take this rustic light fixture and move it inside the house.
Here’s my tutorial for how to create your own grapevine ball light fixture as an accent piece for any room! And it’s super cheap so even better!
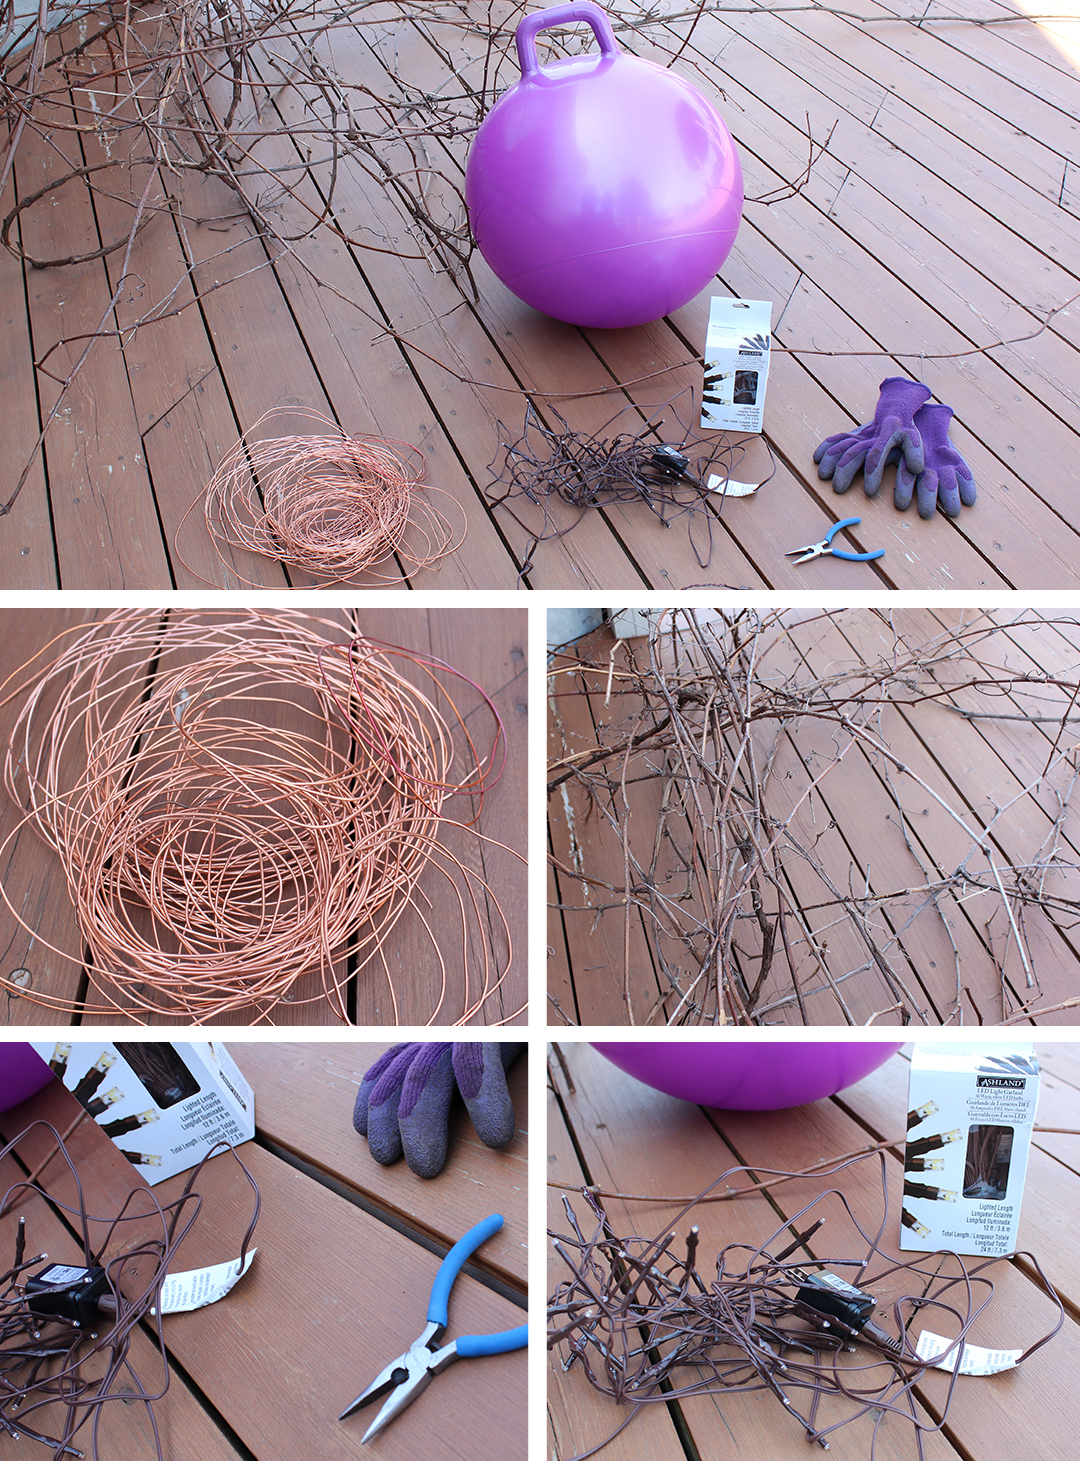
What you will need:
1 Deflatable ball ($1-$3 at the dollar store)
Grapevine (Free! It’s everywhere in Canada)
Wire (I had some lying around – but you can get it a Michaels with a coupon pretty cheap)
Lights (I got mine from Michaels’ Craft Store about $15 each set and I got 2 sets because I created a larger ball – I used 100 lights for mine) *NOTE: if you purchase lights at Christmas, it would be even cheaper. I bought mine out of season sadly.
Pliers
Gloves
String
A hook to attach it to the ceiling
A loving partner or friend who is willing help! (Thanks Hunny xo)
Great, let’s begin!
Step 1:
Strip the branches/bark pieces off of your grapevine. If you’re going to be putting this light inside like I did you probably won’t want to keep as much of the bark on. As soon as you bend the grapevine, bark pieces should fall off. This is the most tedious task of the project.
Step 2:
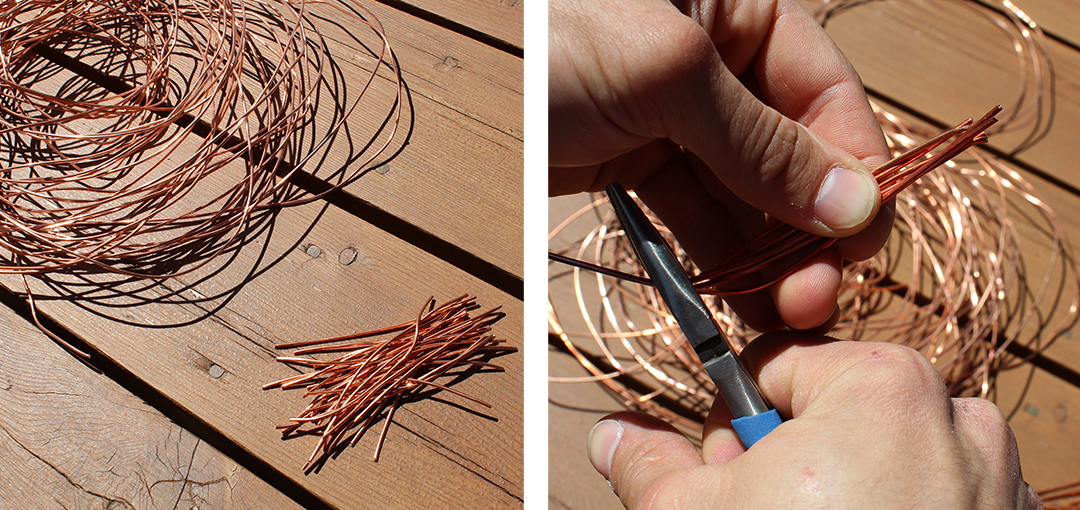
Cut your wire into small pieces. We will be using this wire to secure the grapevine together. I used copper wire because I think it looks a bit more rustic but any easily bendable wire would do the job.
Step 3:
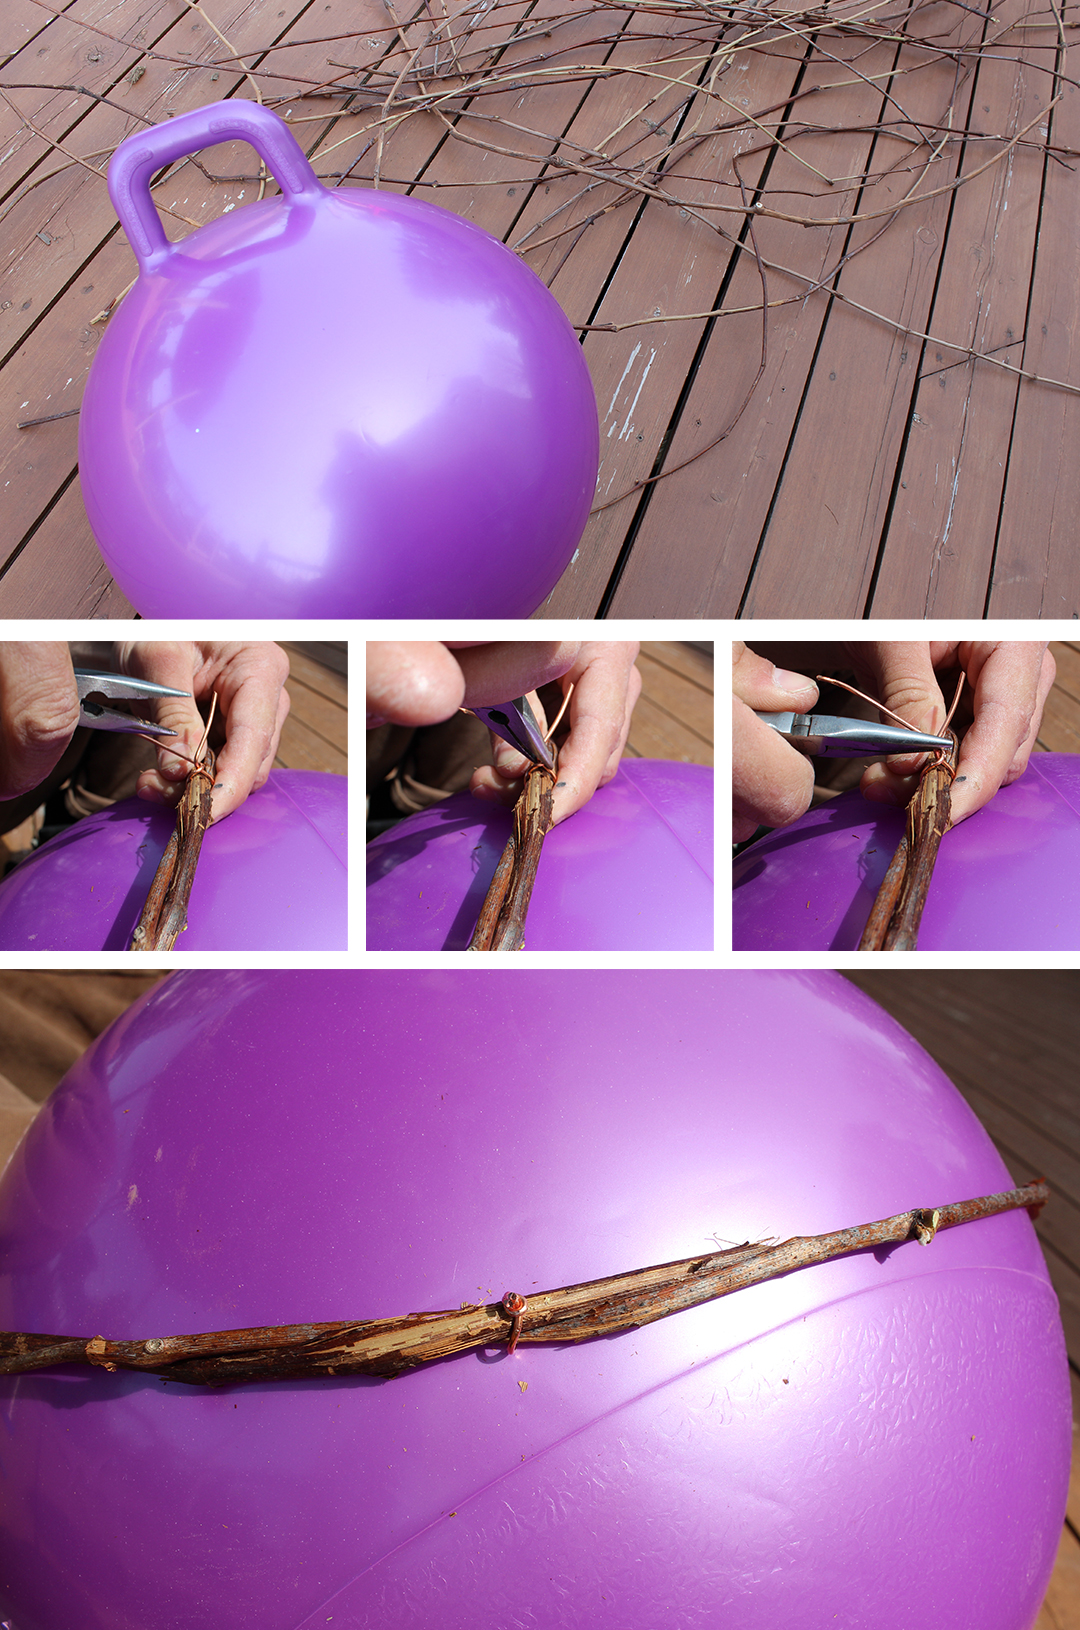
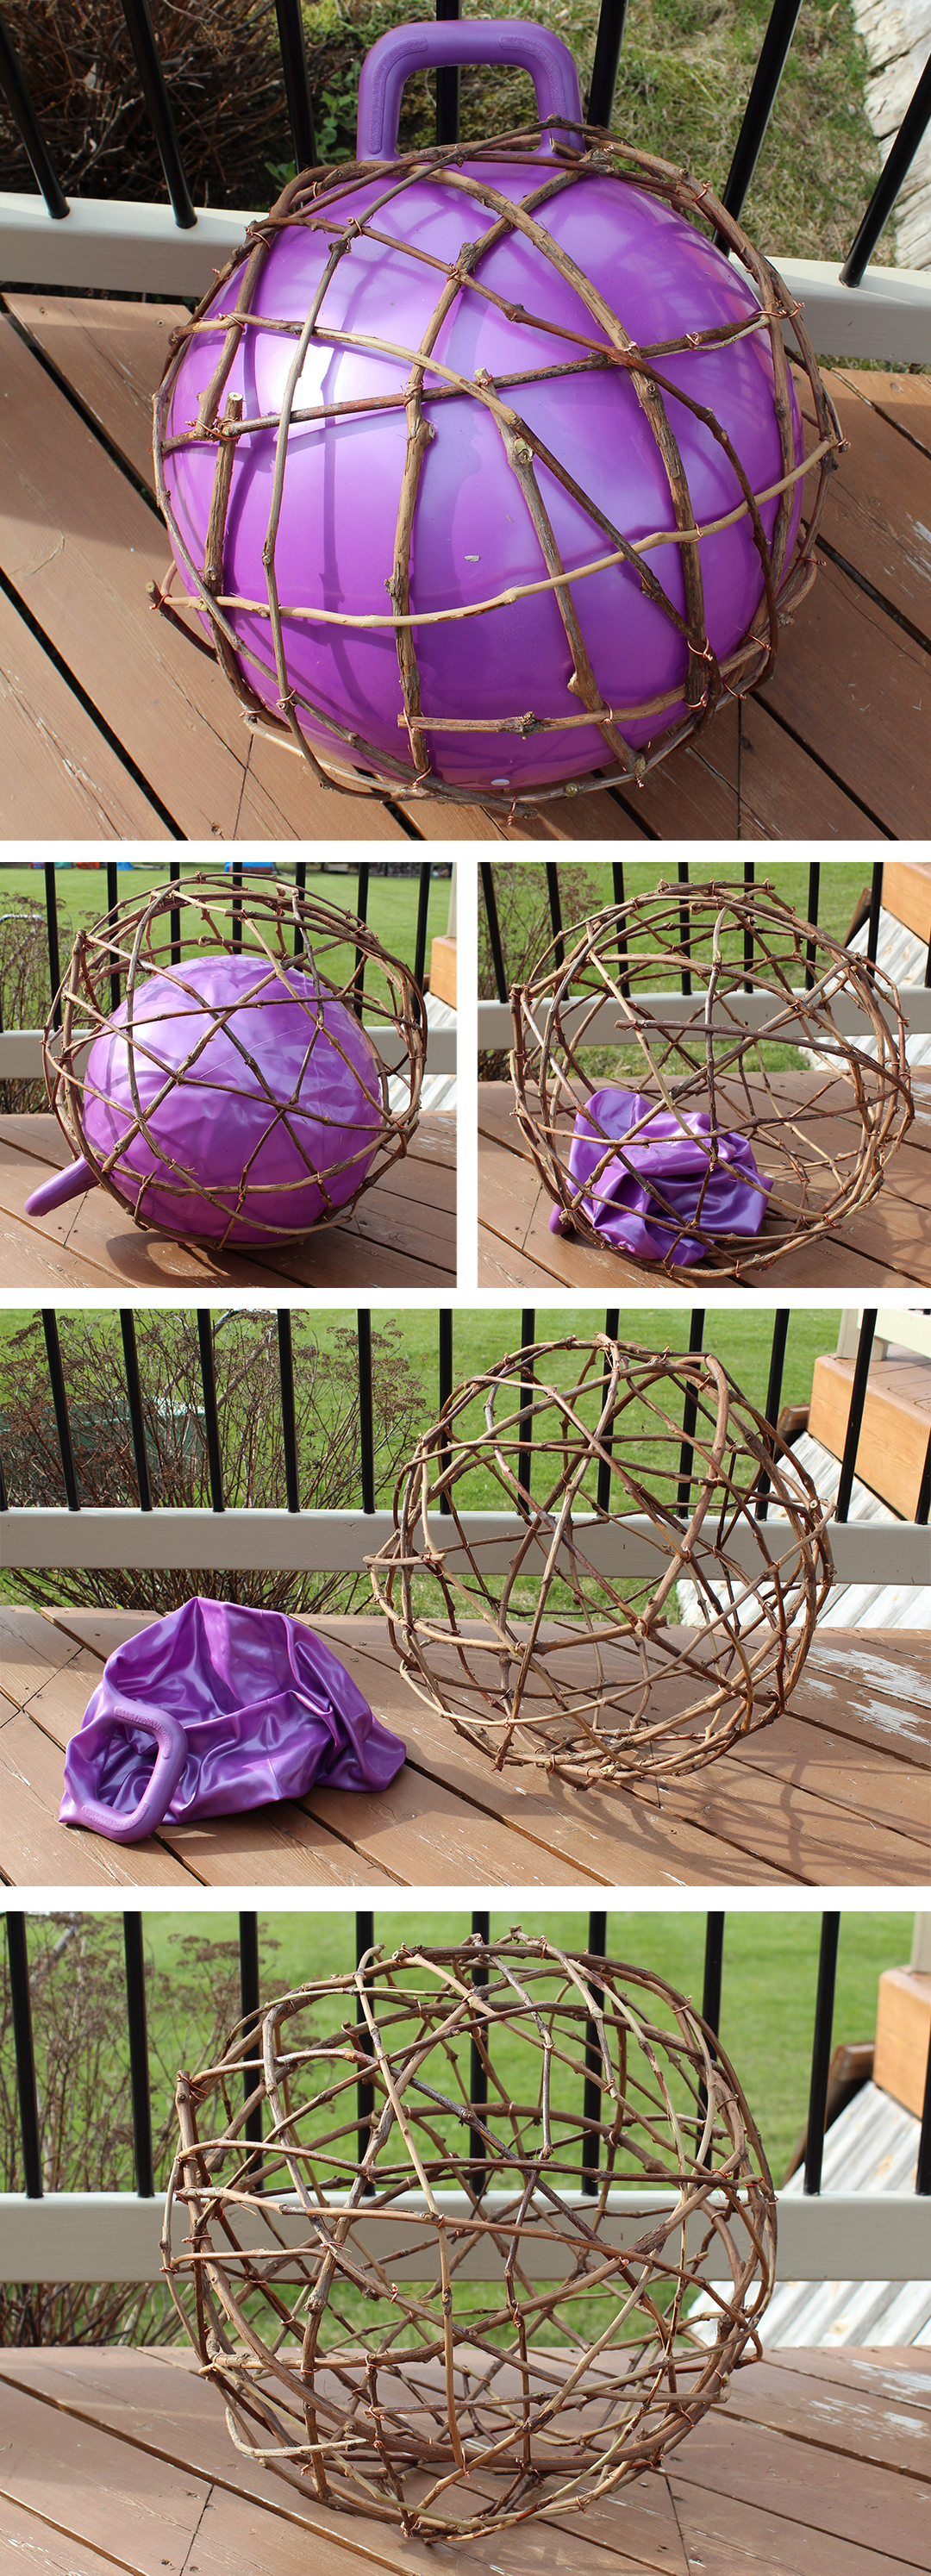
Time to add the grapevine. Wrap the grapevine piece by piece around the ball and secure it with wire like shown in picture above. You will most likely have to trim the wire after.
Step 4:
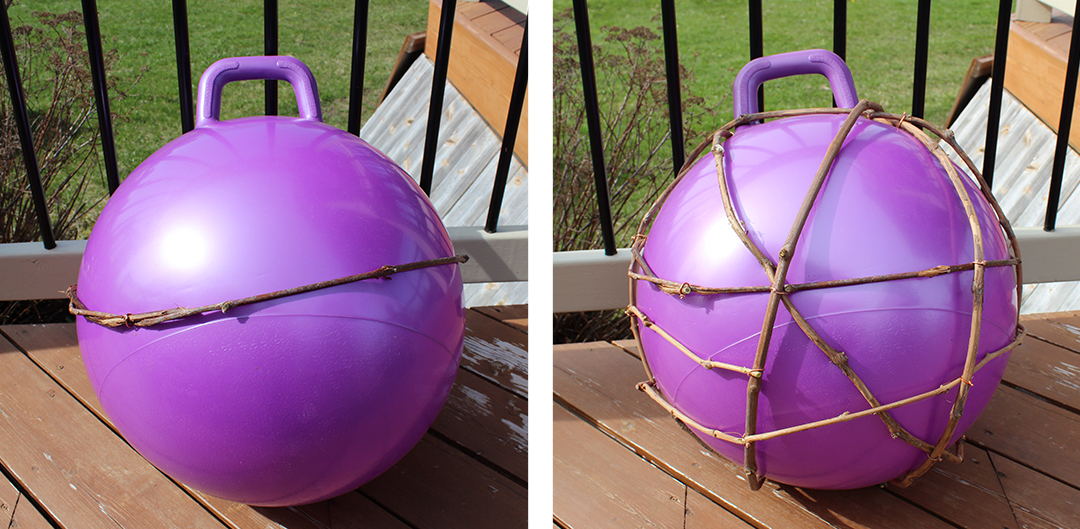
Build up the grapevine! Make sure you leave a big enough hole so the deflatable ball can be taken out later.
Step 5:
Once you think your light will be strong enough without the ball go ahead and deflate it. You might notice more holes now that your ball has been removed. Go ahead and fill these holes with more grapevine if you wish.
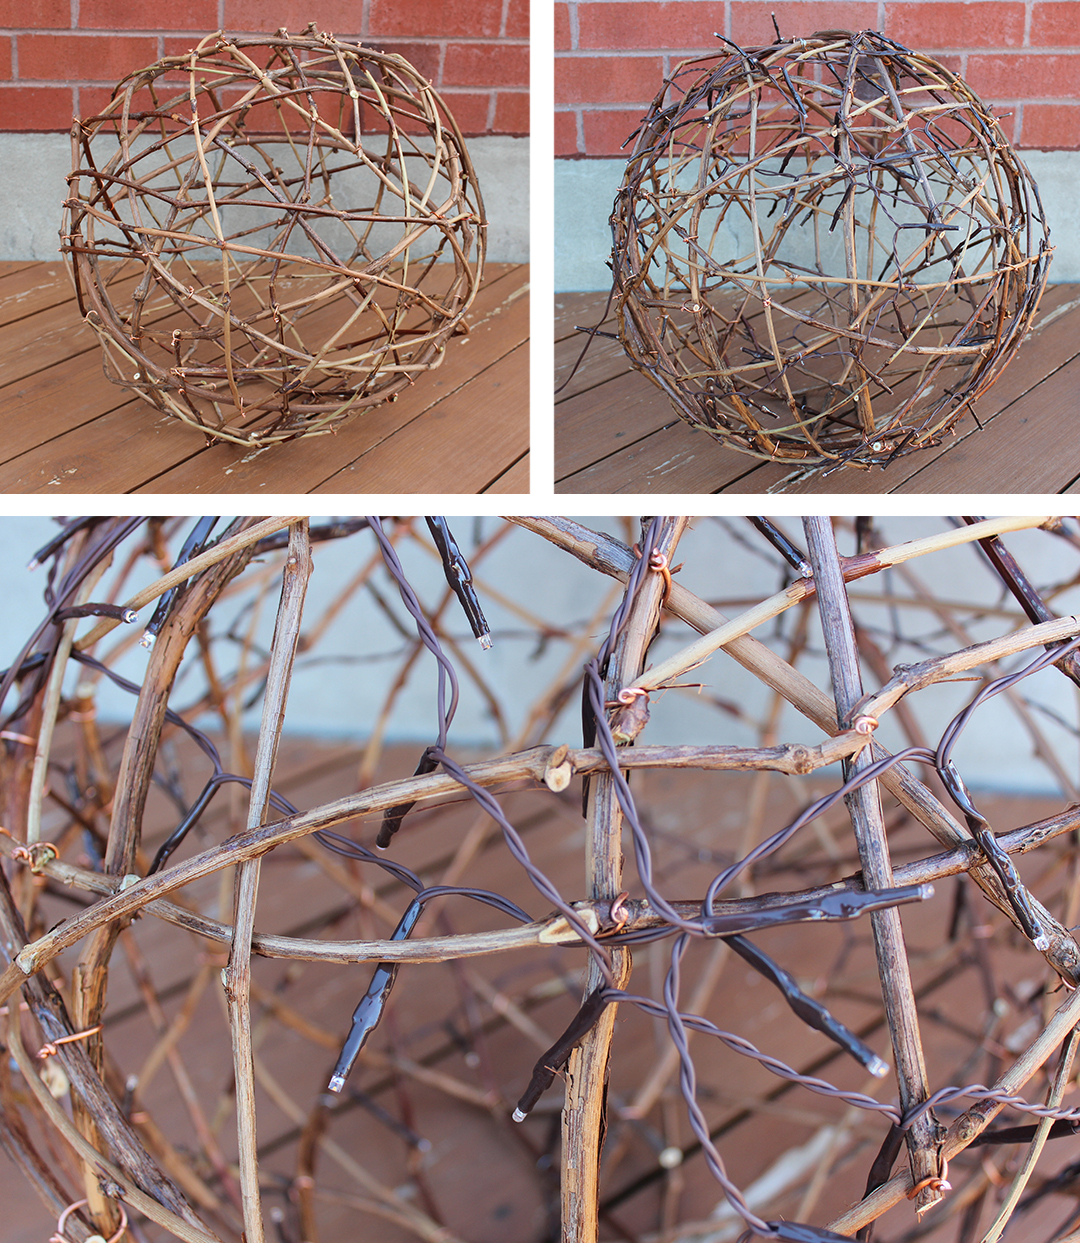
Added step: You can spray your grapevine ball with a clear fixative. I chose to do this mainly because it gave it a glossy wet look. Not everyone’s style though and you don’t have to do this step.
Step 6:
Add your lights! I wrapped my lights around the ball and secured it with wire to prevent the lights from falling off once it is hung. Putting the lights on last is important because it is the easiest way to remove the lights again if one were to die.
Step 7:
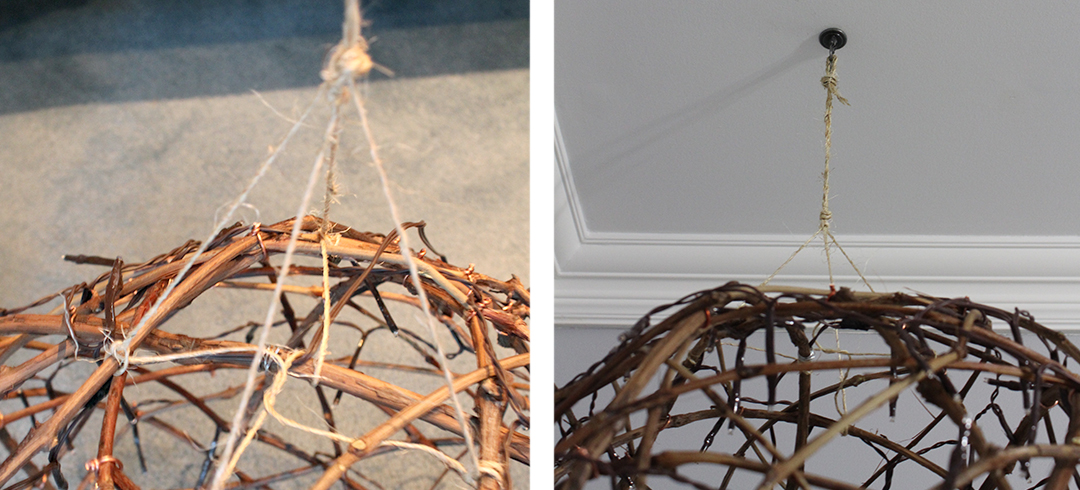
Hang your light for everyone to enjoy! In my case – I hung it in my room so I could admire it every day. What a great little light and it’s actually quite bright! You can always change it up by switching the string lights to a light bulb later if you wanted something even brighter!






7 Comments
Hey this looks really attractive. Thank you for sharing it elaborately and easy to understand process. I am tempted to try out soon but sadly hunting for vines will be tedious here.
Thank you!!! Finding vines can be a little difficult in certain areas. Maybe try some thin branches or twigs! 🙂
I really love it!! <3 <3
Thanks Ana! 🙂
[…] the ceiling once it’s done. You can use String lights as a light source. You can check out abundanceofeverything if you want more details about this […]
[…] from the ceiling once it’s done. You can use String lights as a light source. You can check out abundanceofeverything if you want more details about this […]
[…] Vous pouvez utiliser des guirlandes lumineuses comme source de lumière. Vous pouvez vérifier abondancedetout si vous voulez plus de détails sur ce […]