
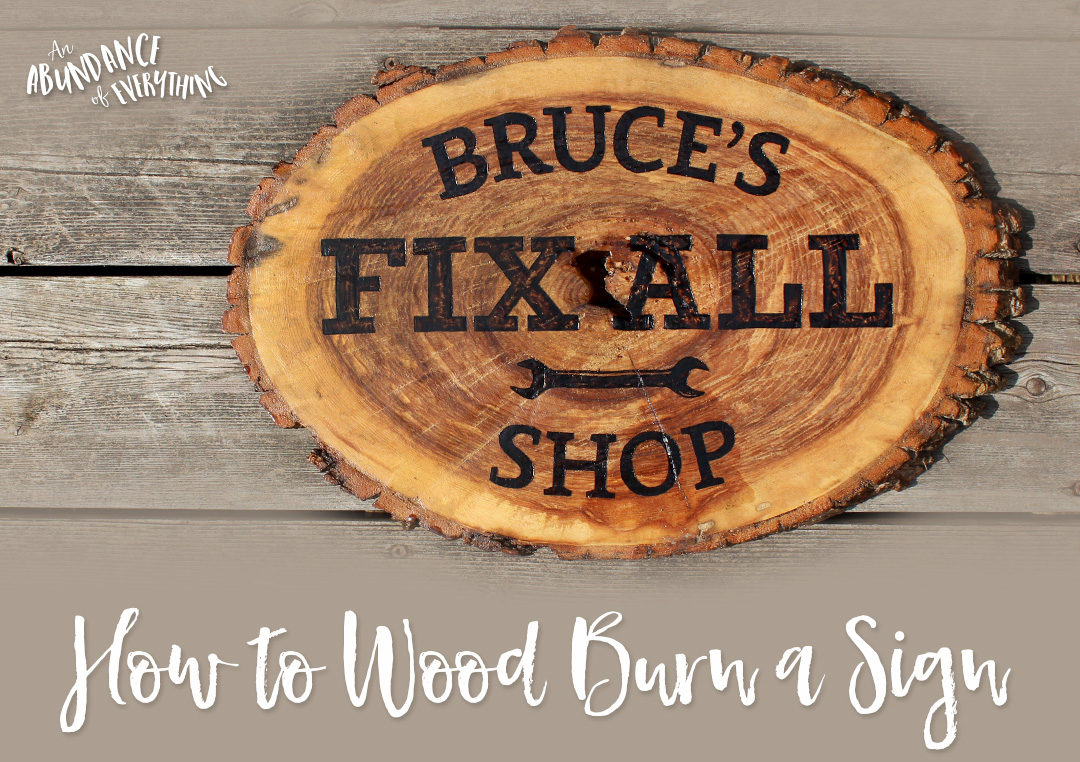
Wood burning is a unique way to create customized (low-cost) gifts.
Last year, I dabbled with wood burning and really enjoyed it. I have used wood burning to customize Christmas decorations, home décor signs and cottage signs. Wood burning gives each item a textured rustic look compared to flat painting.
In this tutorial, you’ll learn how to wood burn your own sign.
What you will need:
1 Wood Slice (Free if you know a handy person/lumberjack – Thanks Brent!)
Wood Burning Kit (approx. $40 at Michaels if you don’t use a coupon. I got mine 50% off!)
A Design Printed Out
Masking Tape
Pencil
Tracing Paper
Paint Brush
Stain or Wood Sealer (to protect/colour the wood)
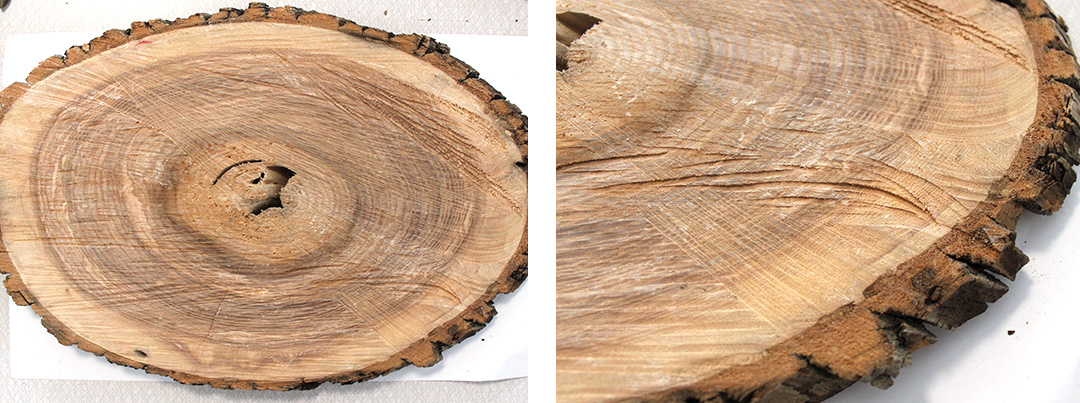
Step 1: Sand Your Wood Slice
This step is important. The smoother the wood, the easier it will be to wood burn. Grooves and dents add character, but they can be difficult to wood burn.
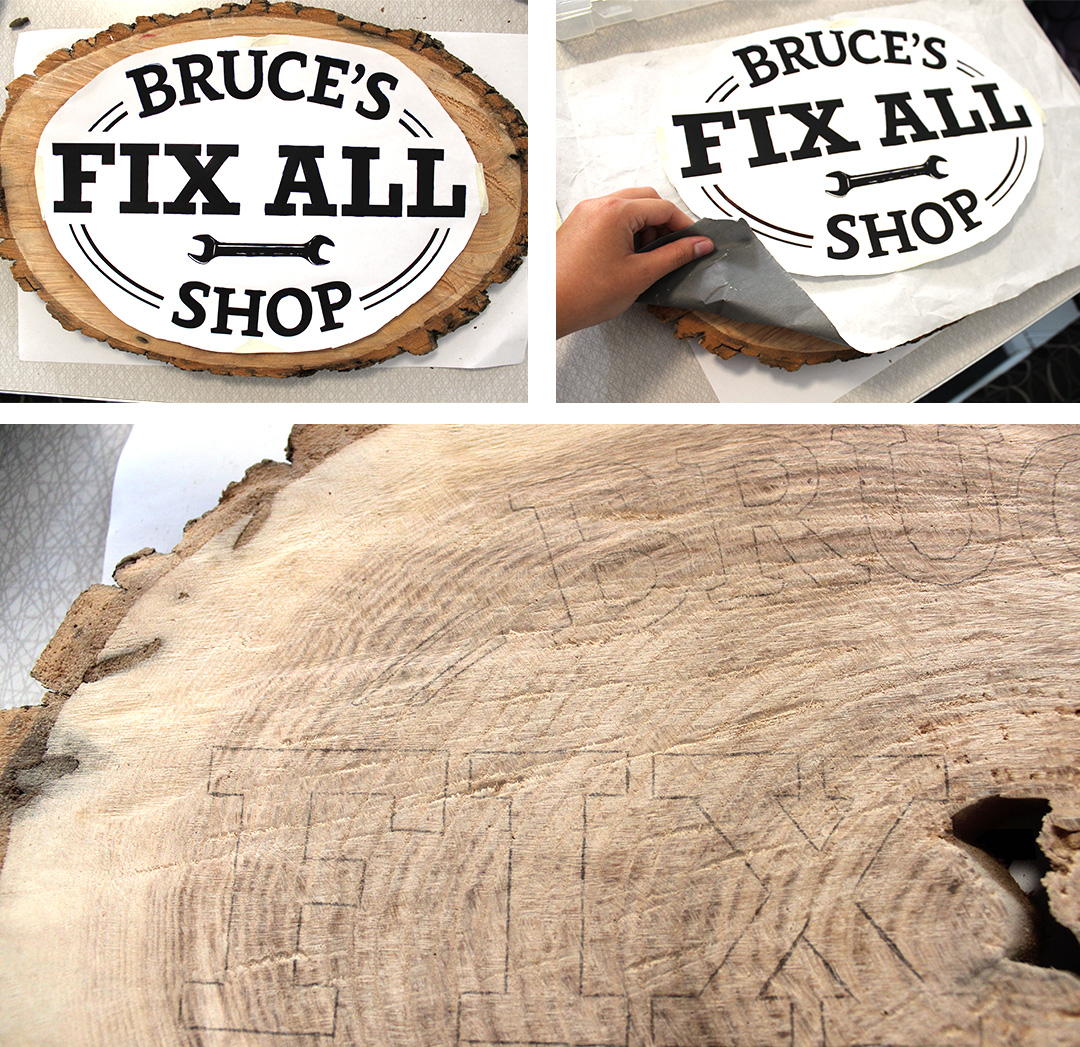
Step 2: Trace Your Design Onto Your Wood Slice
I created my design in Adobe Illustrator, but you can use any design program or better yet, freehand draw! If you choose to draw your design freehand, just be careful, it can be very hard to erase on the wood. If you plan to use a design program, print your design about the same size as your wood slice. Using tracing paper and a pencil, trace your design onto your wood slice.
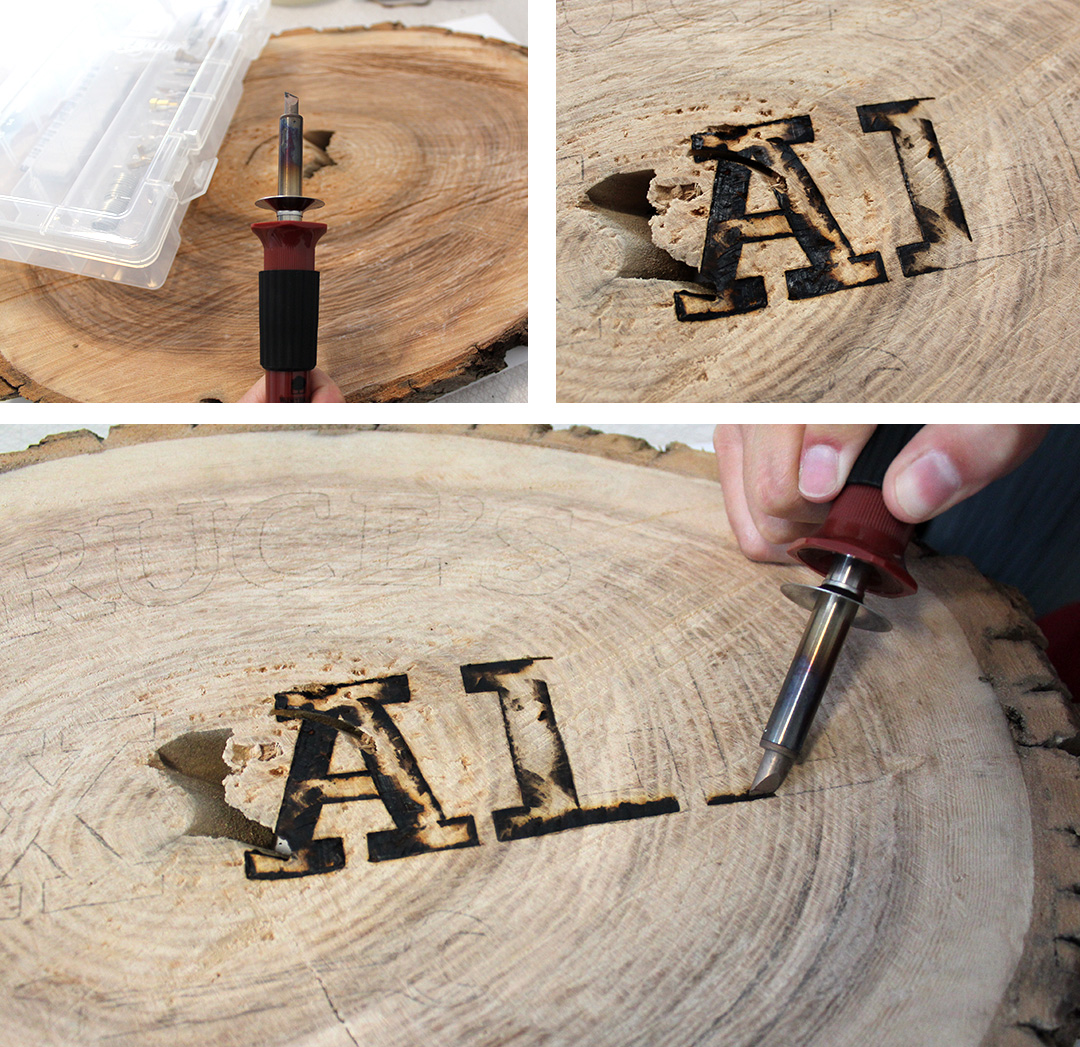
Step 3: Wood Burn Your Design
This is fun part! It can be a little time consuming if you choose a type of wood that doesn’t burn easily so make sure you’ve chosen a piece of wood that burns. I set the temperature of my wood-burning tool to the highest temperature it can reach. I suggest starting with the edges and working your way into the middle of each letter. This way you make sure you get a crisp edge. Feel free to play up how you burn the wood. I choose to only burn parts of the word “FIX ALL” for a different effect.
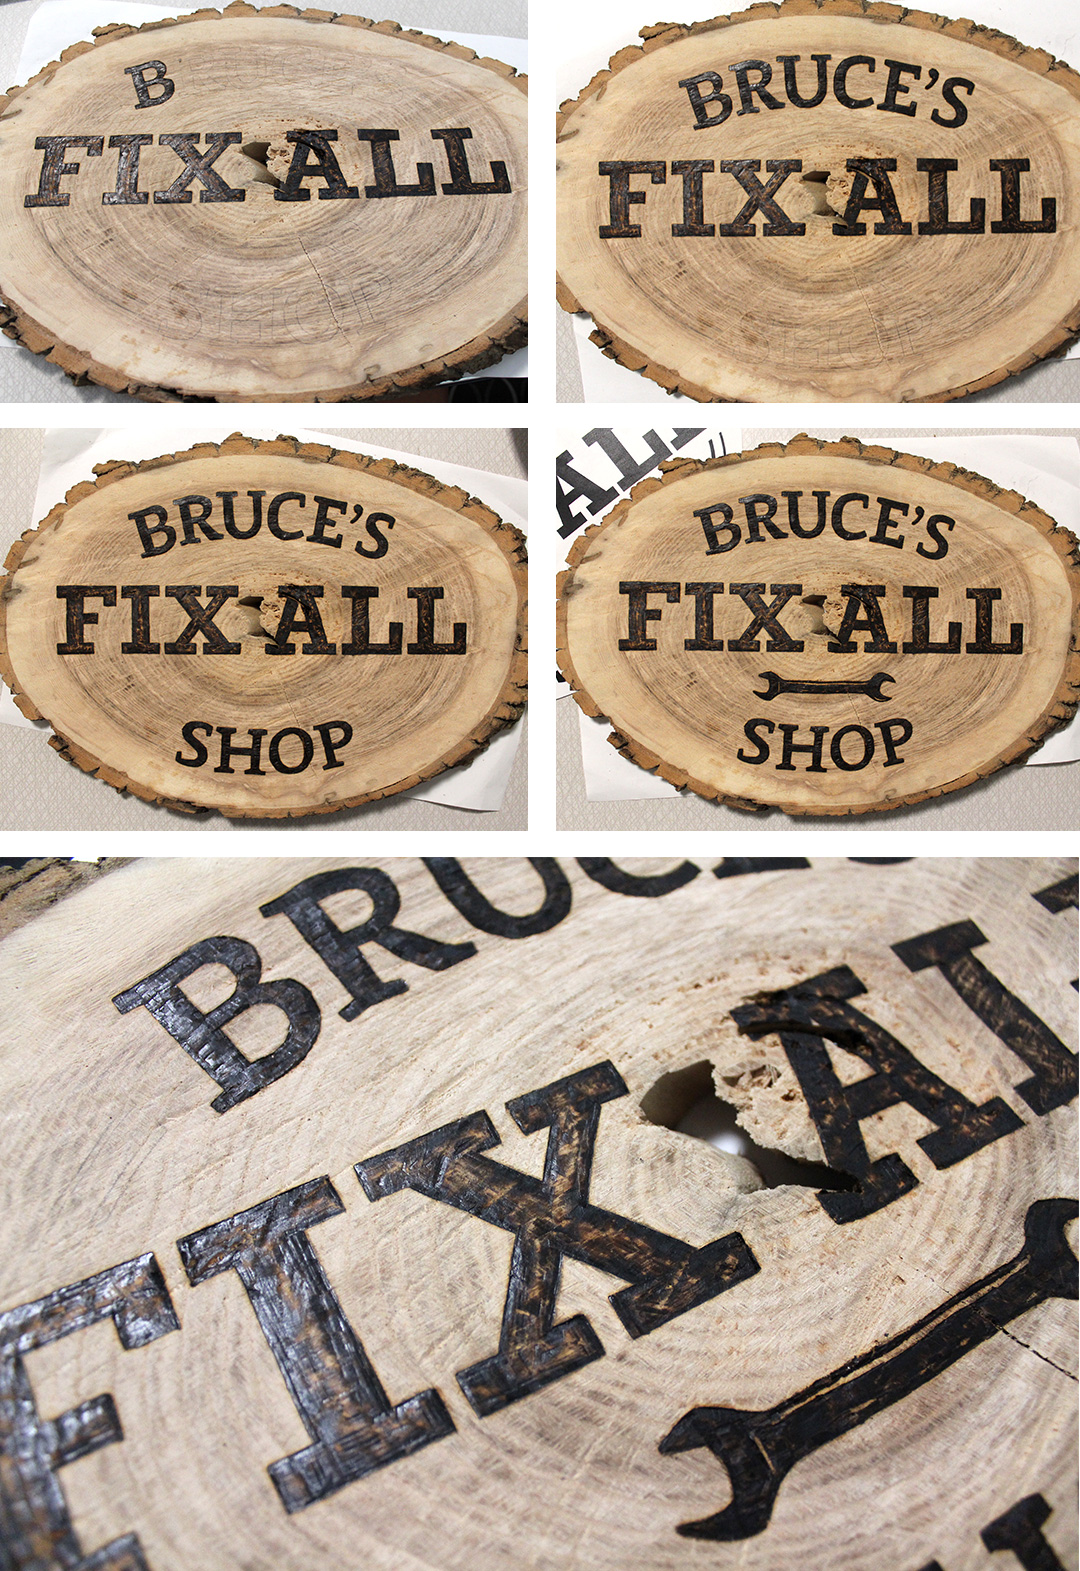
Step 4: Stain Or Wood Seal Your Sign
This is the final step! Select a stain/wood seal for outdoors. If you’re using stain make sure to test the stain on another piece of wood or the back of your sign first before applying it overtop of your wood burning. Apply as many coats as you’d like until your happy with the colour result. It took two coats to develop the colour of my sign.

That’s it! You’re done! Wasn’t that easy?
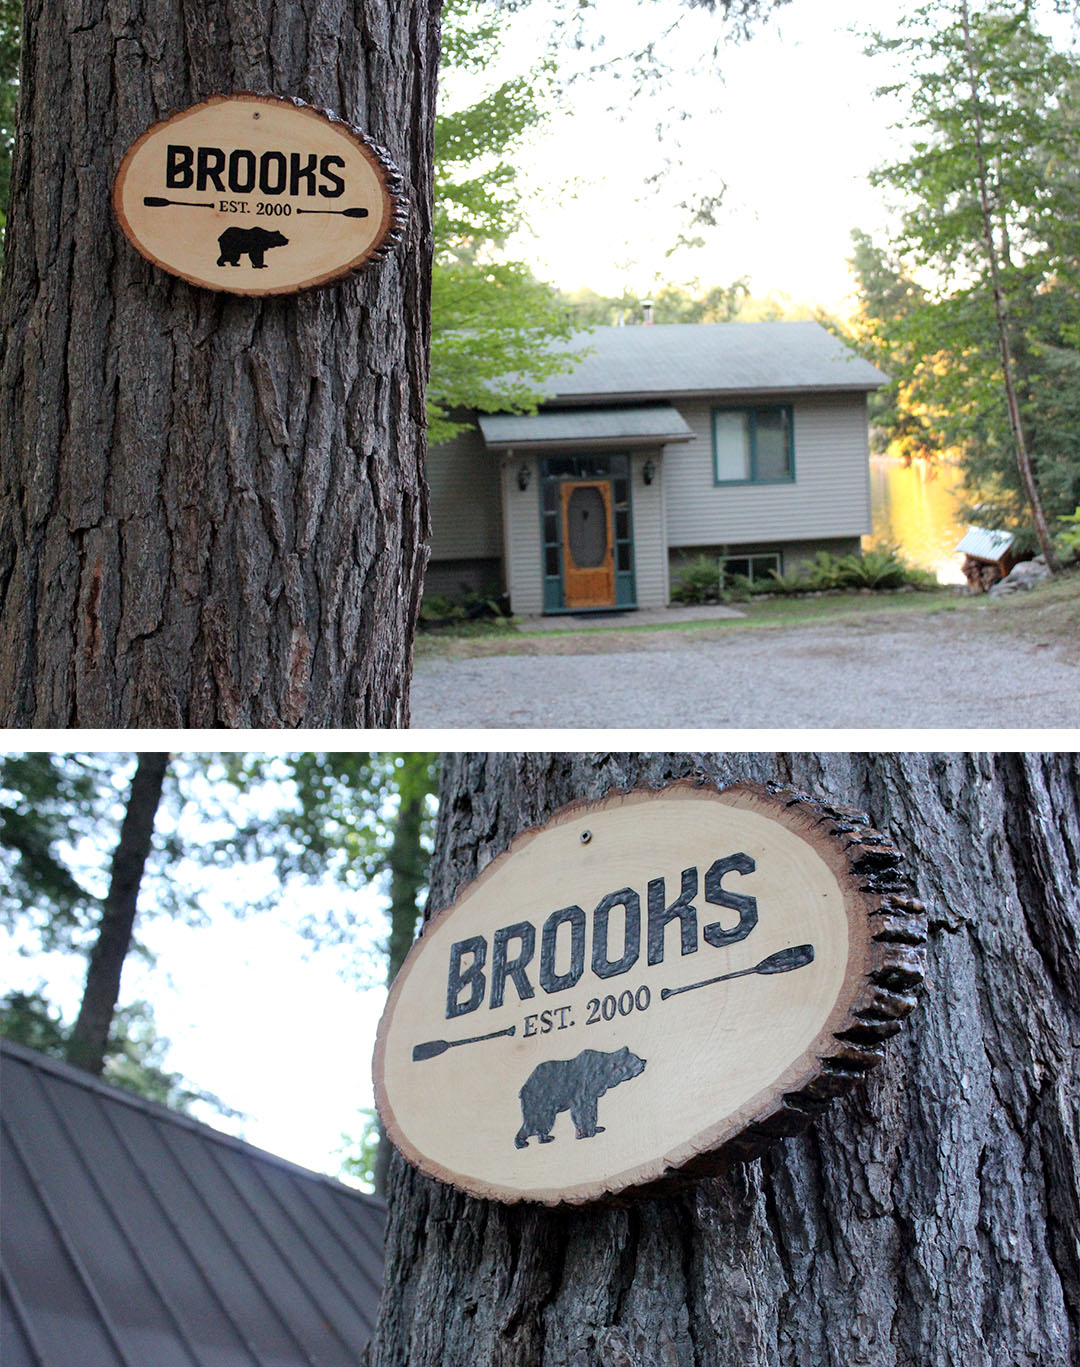
Interested in more wood burning projects?
Here are a few other examples of wood burnt signs I’ve made. Hopefully they inspire you.


No Comments