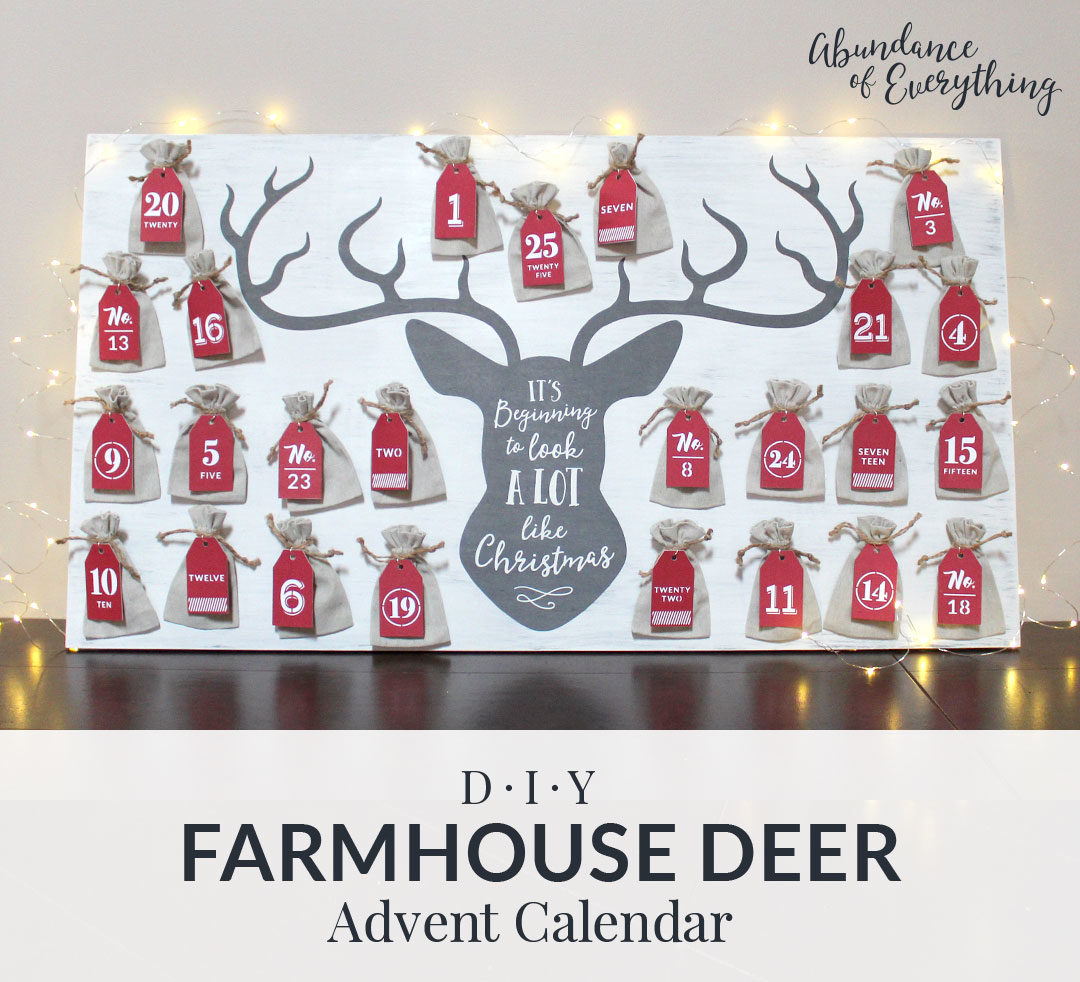
In this do-it-yourself project you will learn how to create your own farmhouse inspired deer advent calendar.
Brent and I decided to make our own advent calendars this year to start new family Christmas traditions together. Earlier this week, I shared how we created Brent’s wooden tree advent calendar and today I’m going to share how we made my farmhouse inspired deer advent calendar.
What You Will Need:
1 Large Piece of Wood – Approximately 38” x 21” or larger to trim to this size
Drill
Pliers
25 Eyelet’s or Small Hooks – I used eyelets and then opened them to make hooks
Wood Stain – MINWAX Wood Finish stain in the colour “Classic Grey”
Chalk Paint – I used Rust-oleum Chalked in Linen White
25 Small bags – I used 3” x 4” Canvas Bags from Creative Bag
25 “Jump Rings” – Small Metal Jewelry Clasps from Michaels
Stencil/Deer Graphic
Scrapbook paper – Red and White
Rubber Cement Glue – Curry’s
Zig 2 Way Glue – Michaels
2 Cereal Boxes
Cricut – Not 100% needed, but if you have one you will want to use it!
Step 1: Cut Wood and Apply First Layer of Stain
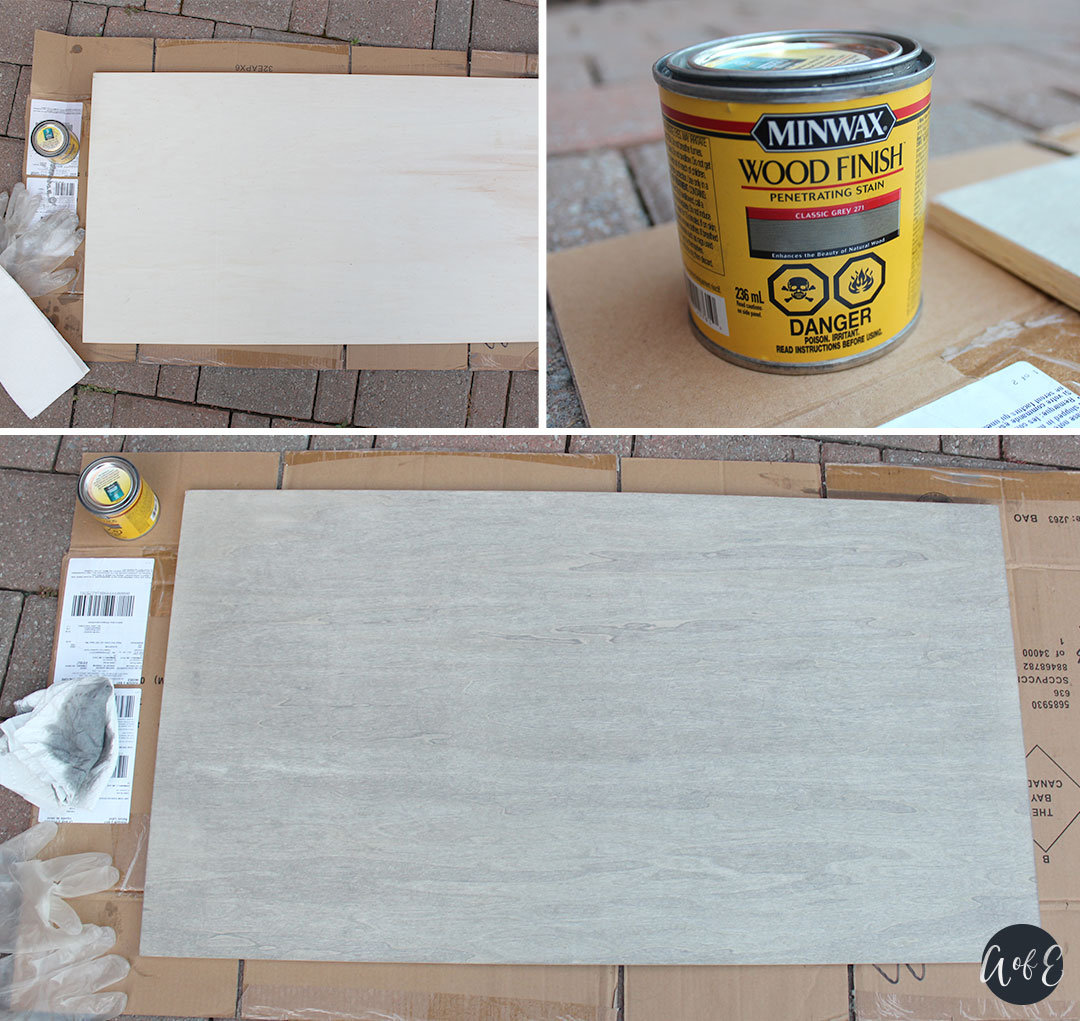
Cut your piece of wood to be 38” x 21” (w x h). Stain both the front and the back of the wood. I used MINWAX Wood Finish stain in the colour “Classic Grey”. Apply the stain in thin layers so it doesn’t get too dark. I used two coats of stain.
Step 2: Paint The Back of the Advent Calendar with Chalk Paint
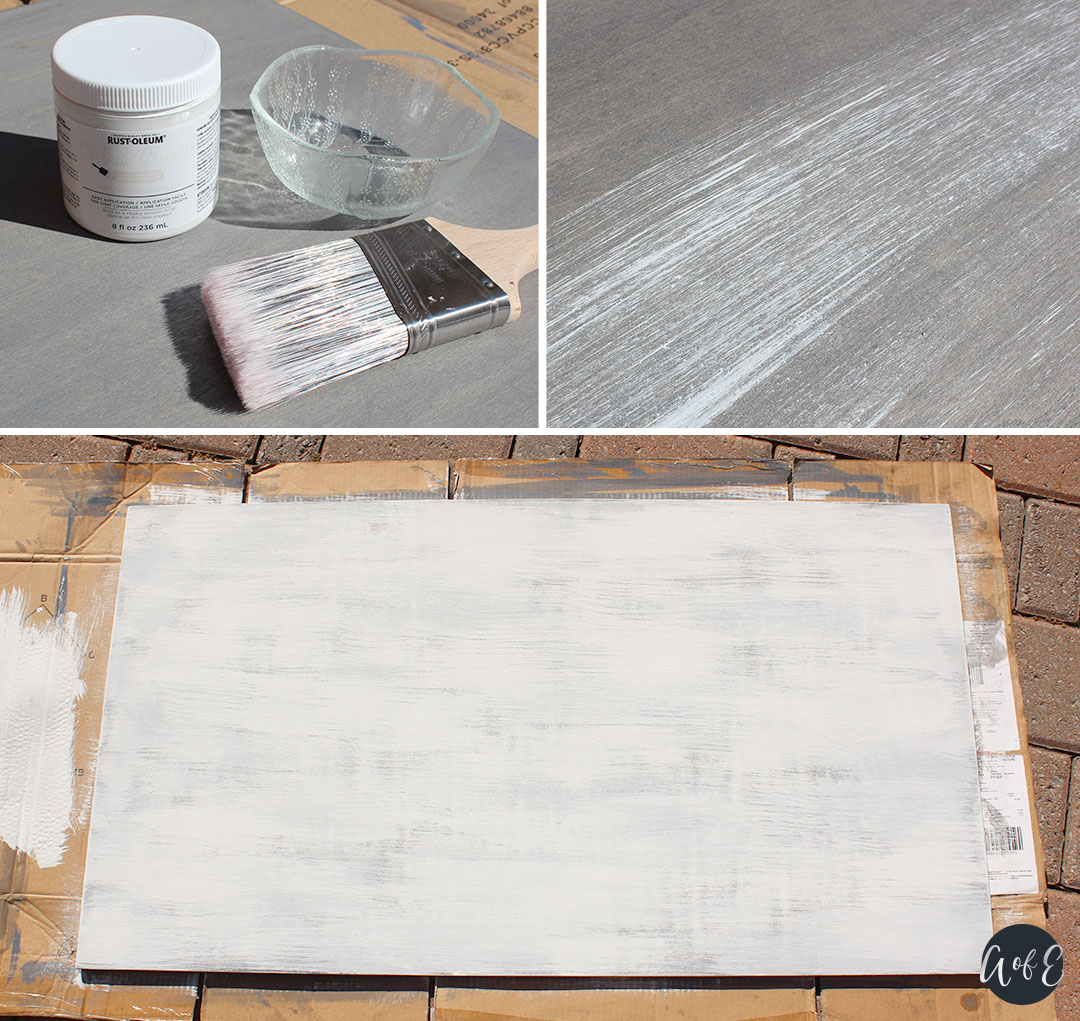
Paint the back of your advent calendar using dry brush technique and chalk paint. I used Rust-oleum white chalk paint. To achieve a dry brush technique, put some paint on a plate or piece of cardboard and tap your brush into the paint. The less paint the better. I typically do a couple test strokes on cardboard before painting on the actual wood to get rid of excess paint. Although I know it’s the back and most people won’t see it, I still recommend painting it. Think of it as practice before you paint the front of the board. This gives you a chance to decide how distressed you want your board to look. The less white paint, the more distressed it will look.
Step 3: Cut Out Stencil and Apply it to the Front of the Board
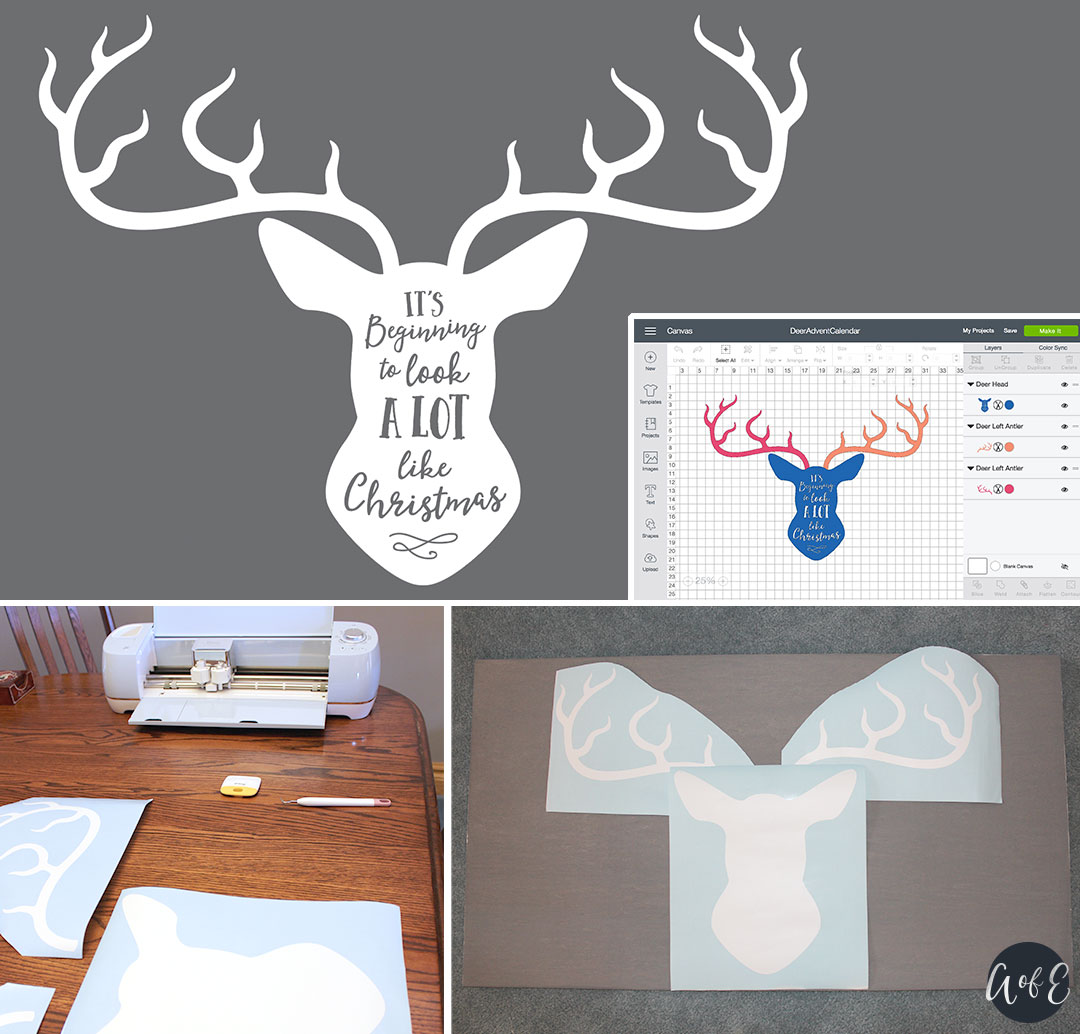
Using your Cricut; cut out the deer stencil for your advent calendar on removable vinyl. If you’d like to use my images you can download them by clicking here (You’re Welcome!).
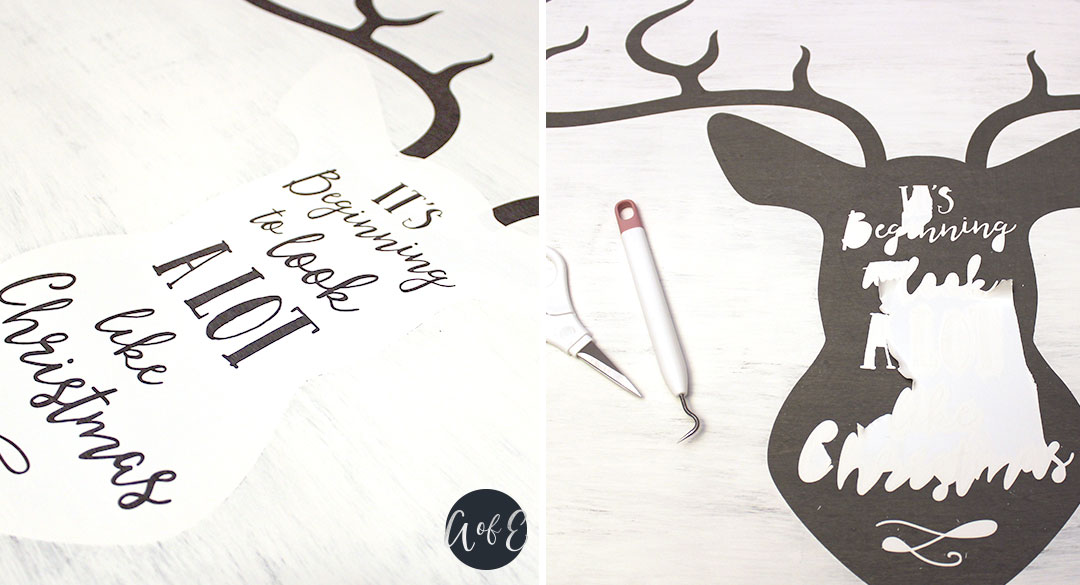
You will need to use 3 separate images to cut out the deer because the Cricut only allows you to cut out images 12” wide and these images will most likely be larger depending on the size of your advent calendar. I have provided PNG’s of the right antler, left antler and the headpiece with the quote for you. As you can see in the image, I have made these images 3 separate colours so my Cricut will cut them out on 3 different cut sheets.
Once you have cut the images and weeded out the negatives, apply them to the front of the board and remove the vinyl backing. Don’t forget to weed out the quote, as you will want to paint it in the next step. All areas that are covered in vinyl will remain the grey stain colour, which we stained in the previous step.
Step 4: Paint the Front of Advent Calendar with Chalk Paint
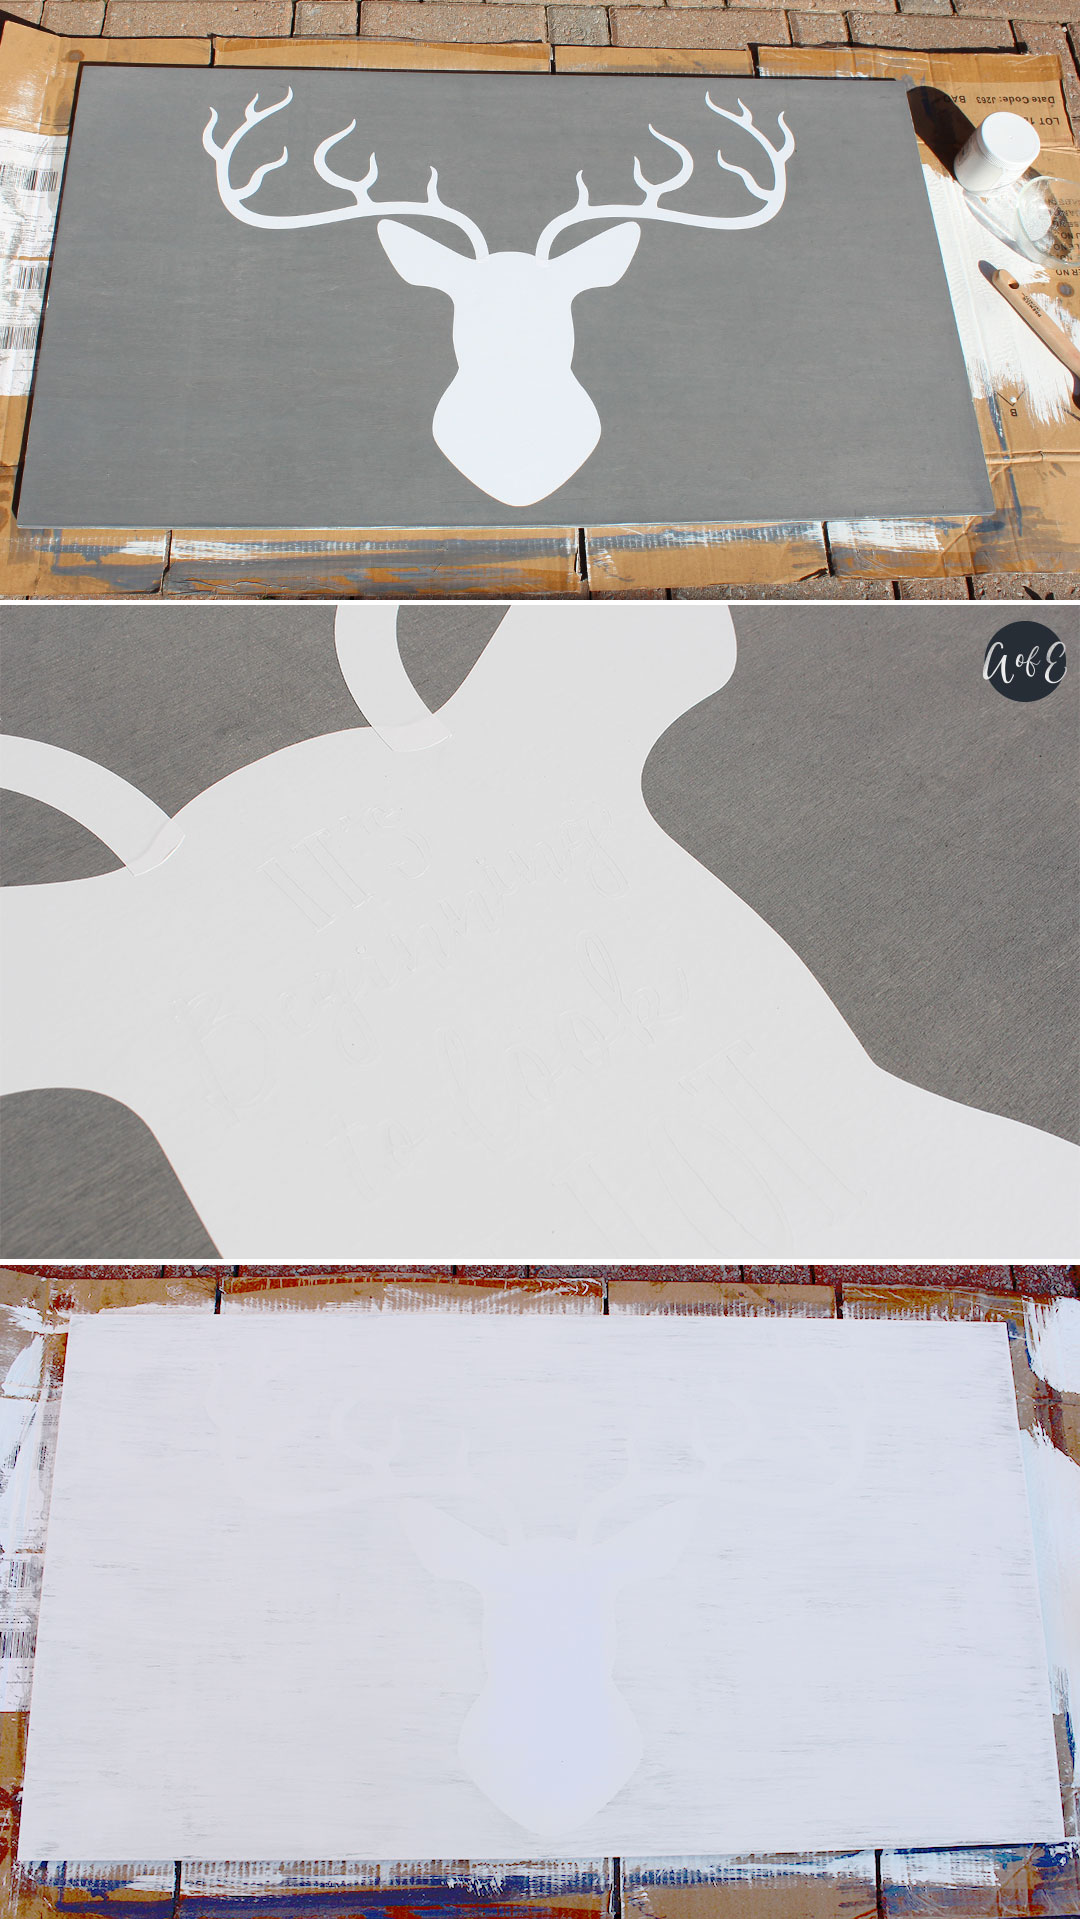
Using the same dry brush technique you practiced in step 2, paint the front of your advent calendar. Don’t forget to paint the quote as well.
Step 5: Remove the Stencil
Once your paint has dried, remove the vinyl stencil. I removed the antlers first and then carefully removed the vinyl headpiece. As you can see, where I had the vinyl remained the grey stain colour.
Step 6: Pencil Position for Canvas Bags
Now that you’ve got your deer advent calendar painted, position where you would like your advent calendar bags. Once your happy with the position, pencil dots so you know where to drill your holes. You should be penciling near the top of each advent bag so it hangs properly from the hooks. I used a ruler to make sure my dots were inline with each other. You can position your advent calendar bags however you’d like, I chose not to cover the deer.
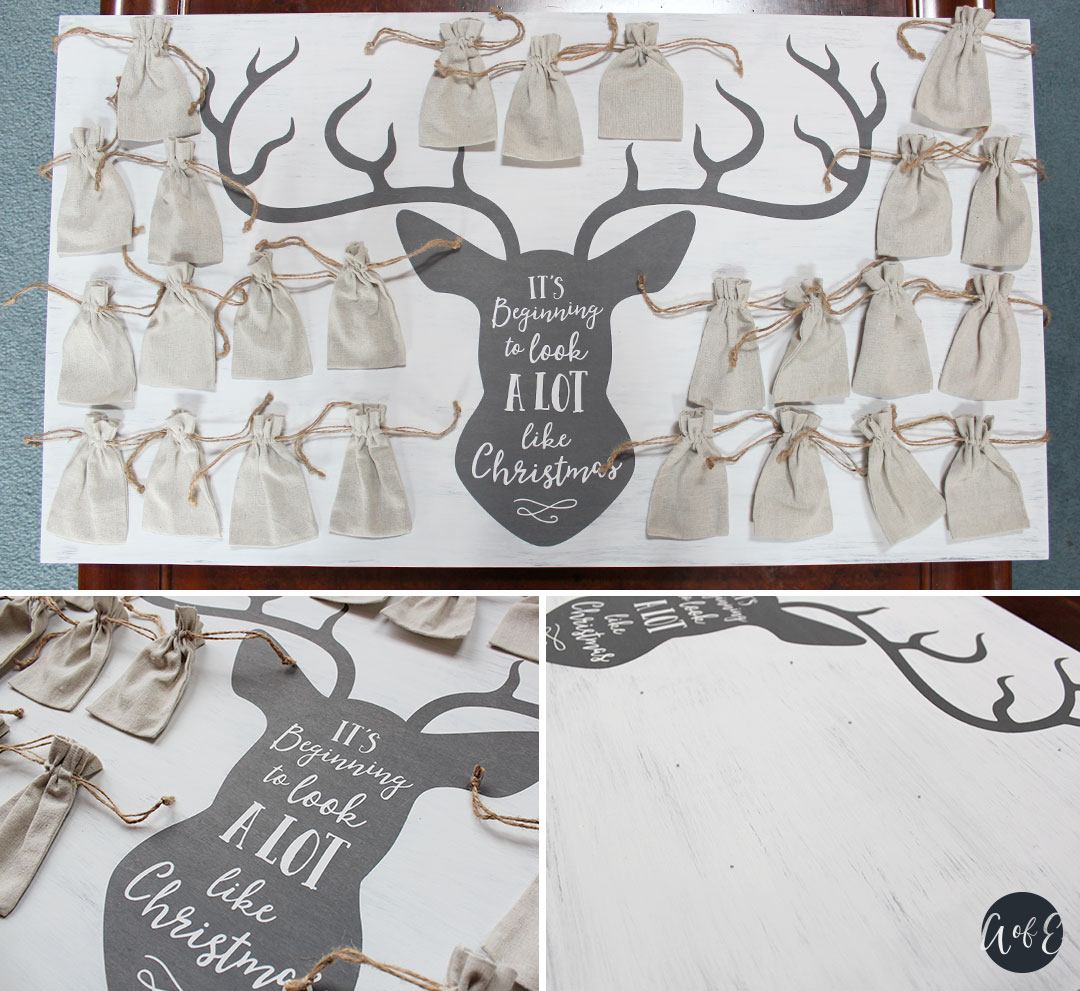
Step 7: Drill Penciled Dots
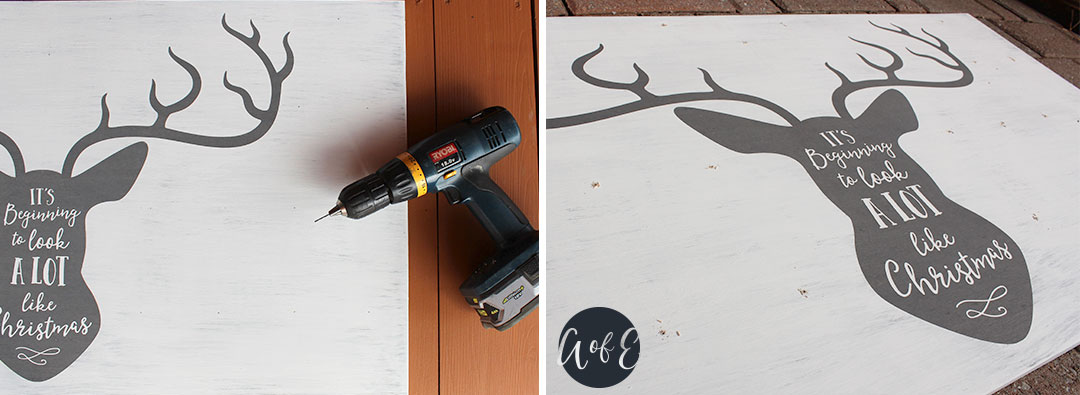
Drill each penciled dot you made in the pervious step. Make sure not to drill right through the wood. Use a drill size that is smaller than your hook size.
Step 8: Screw in Hooks
I was not able to find hooks small enough so I used small eyelets and cut them into hooks. Using eyelets might be a cheaper option for you. Screw in the 25 hooks into the 25 holes you just drilled.

Step 9: Cut Out Tags for Advent Calendar
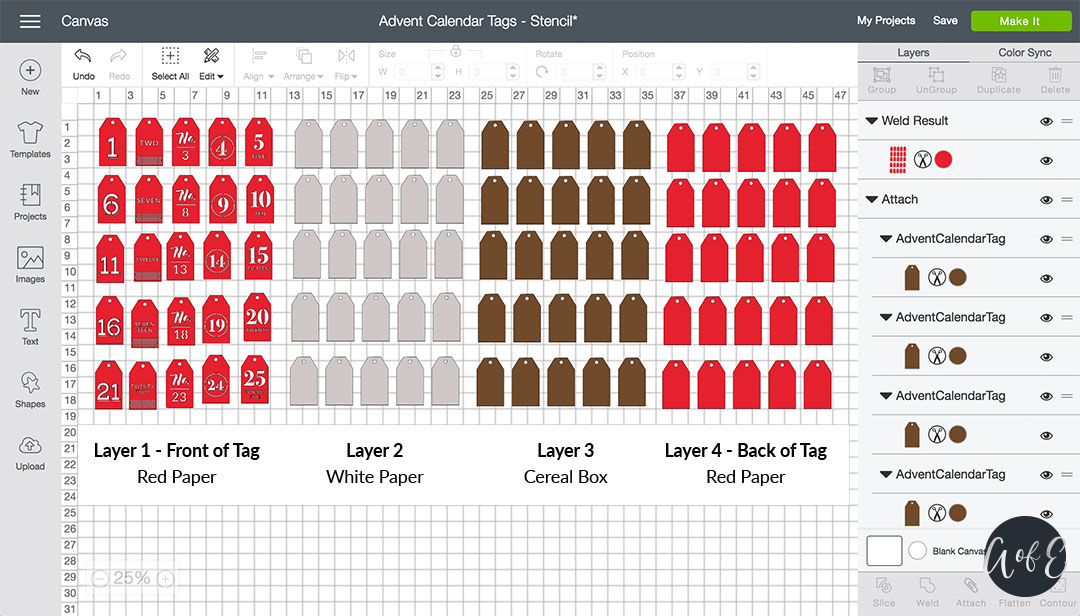
Using your Cricut, cut out 25 numbers tags on red cardstock, 25 plain tags on white cardstock, 25 plain tags on thin cardboard (cereal box) and 25 plain tags on red cardstock. The thin cardboard/cereal box is the most important part because it will make your tags stronger. If you use these materials you shouldn’t have to worry about your tags bending or getting damaged as easily. Use the image I have provided as a guide. If you would like to use my number tags, click here to download them for your own personal use.
Step 10: Assemble Advent Calendar Tags
Once you’ve cut your tags, you can assemble your advent calendar tags using rubber cement and Zig 2 Way glue.
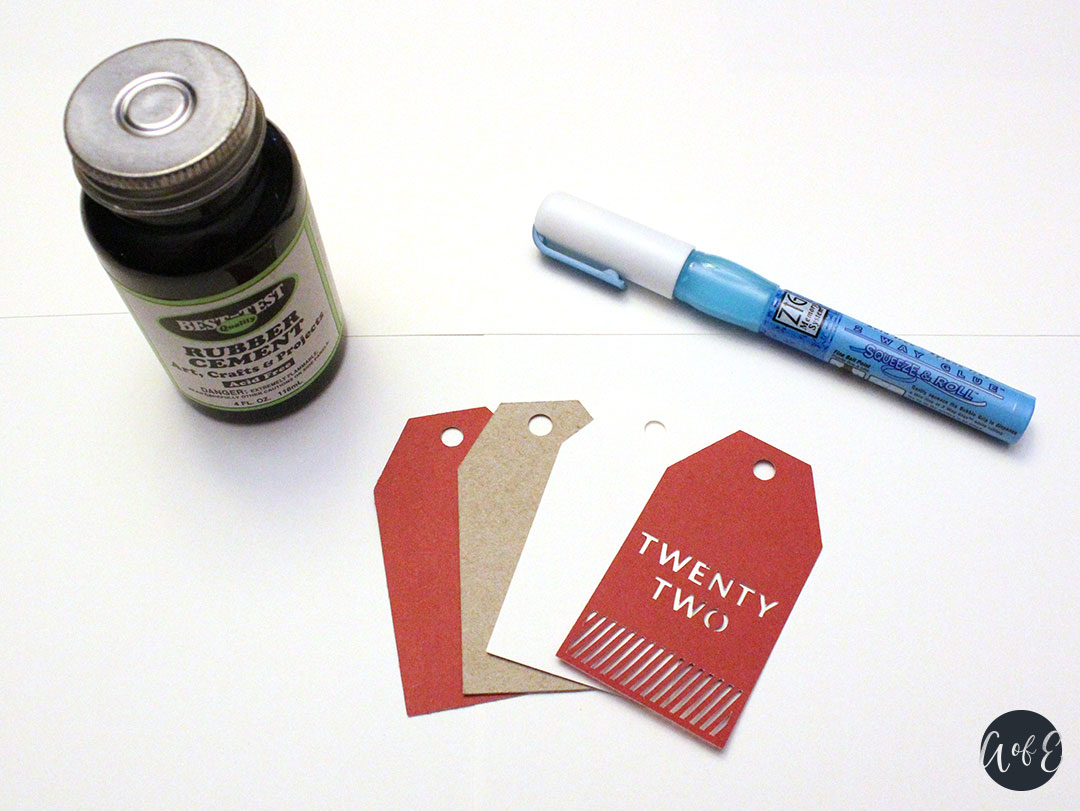
Rubber cement the white cardstock tag to the thin cereal box tag. Flip the tag over and rubber cement the red cardstock tag to the back of the thin cereal box tag. Your tag should be red on one side and white on the other with a thin layer of cereal box cardboard in between. Using Zig 2 way glue, apply a thin layer of glue to the back of your red cardstock number tag. Make sure the number/word is backwards, so you’re not applying the glue to the front of the tag (I did this a couple times by accident… oops). Once the glue has set a bit, flip the red numbered tag over and press it to the white side of your cardboard tag. You should see the white through the negatives of your tag.

Step 11: Attach Tags to Advent Calendar Bags
Use small jump rings to attach the each tag to the string on our burlap bags. I got these jump rings from Michael’s but almost any jewelry making store will have these. You will most likely have to use pliers to open the jump rings. Make sure the knot at the end of the bag string is big enough that the tag will not fall off.
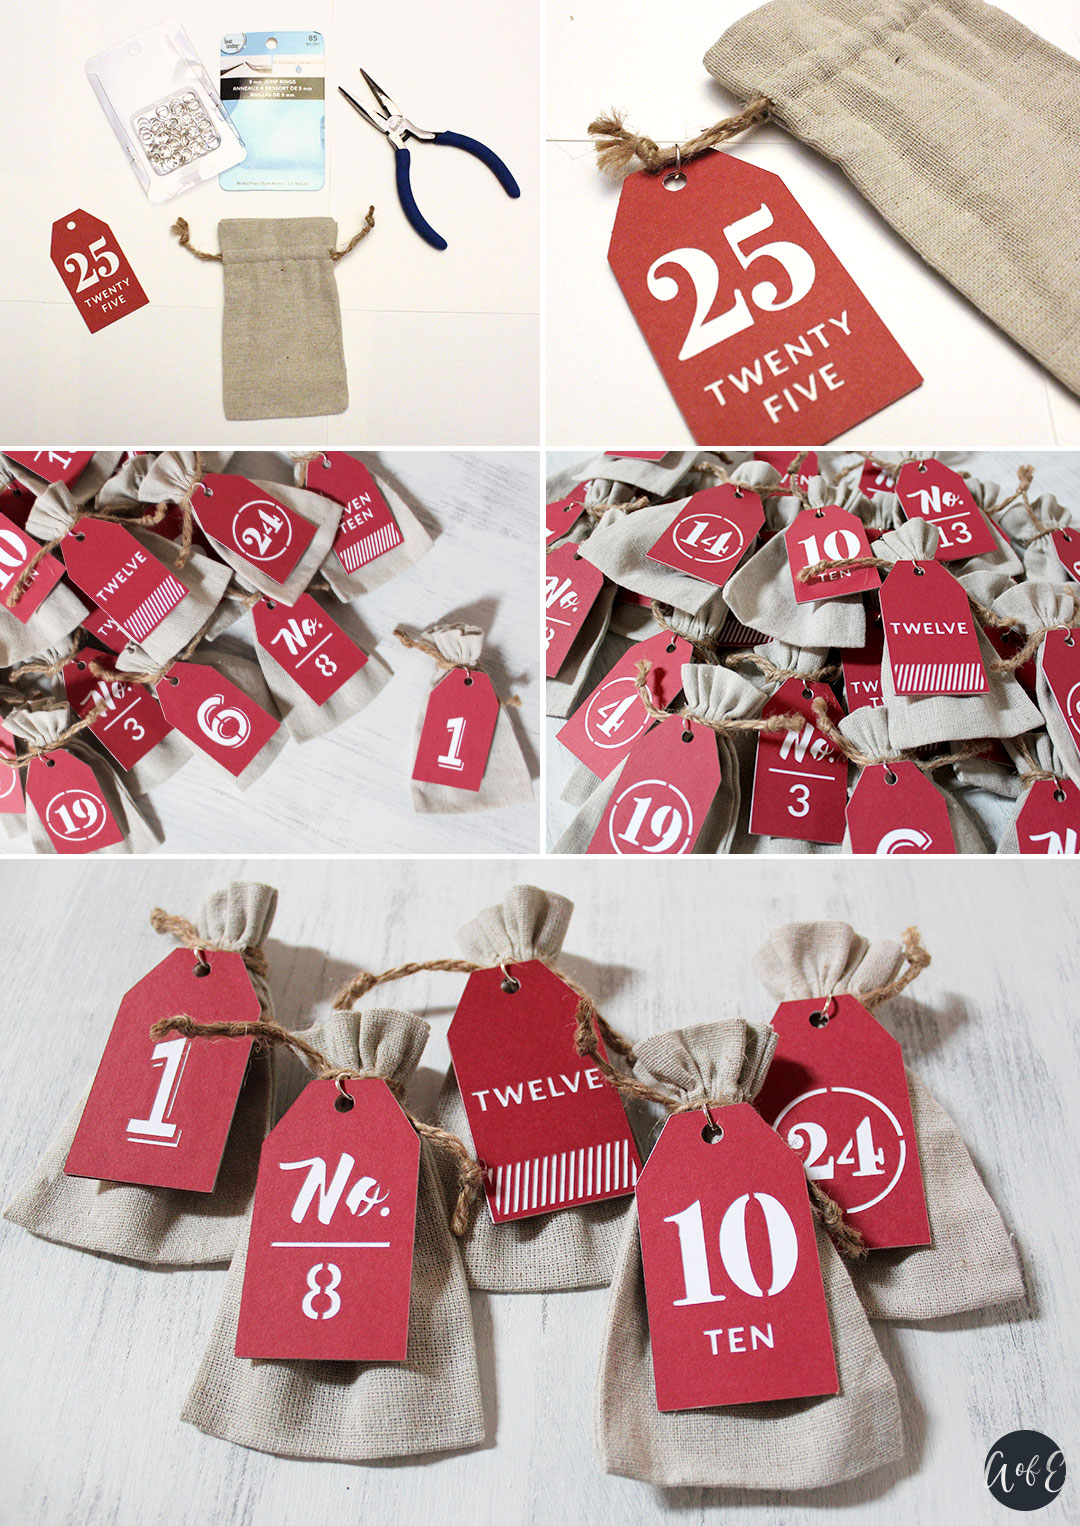
Step 12: Fill Each Day with Goodies and Hang on Advent Calendar
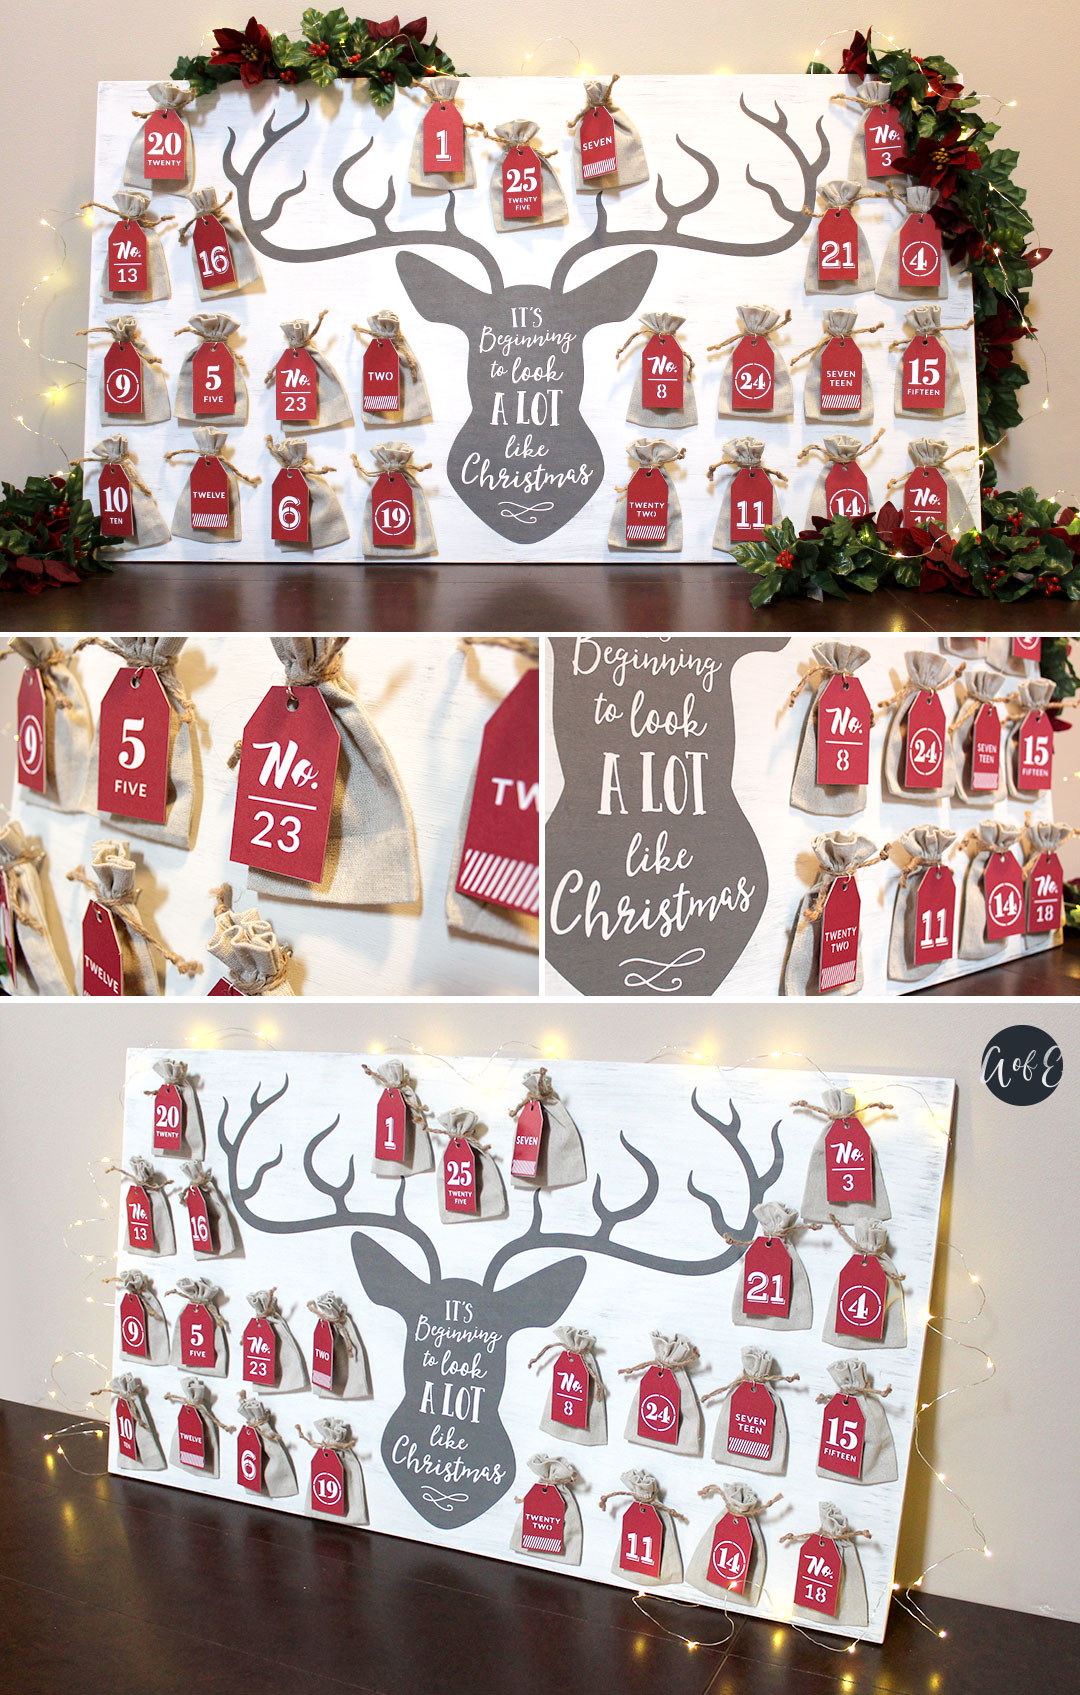
The Best Part! Fill each advent bag with goodies and hang them onto the farmhouse deer advent calendar. If you wrap the drawstrings around the hook before tying it, it should hang nicely on the hook.
I can’t wait to see what small surprises Brent has filled each advent calendar bag with!
Happy Holidays!



No Comments