

In this do-it-yourself project you will learn how to create your own wooden tree advent calendar.
I love Christmas; it has always been my favourite holiday. I’m all about the decorations, warm fires, cheesy Christmas movies and family traditions. My boyfriend is a bit of a “Bah Hum Bug” when it comes to the holidays so, to help him get into the Christmas spirit, we (I) decided to create our own advent calendars this year and start new family traditions together.
What You Will Need:
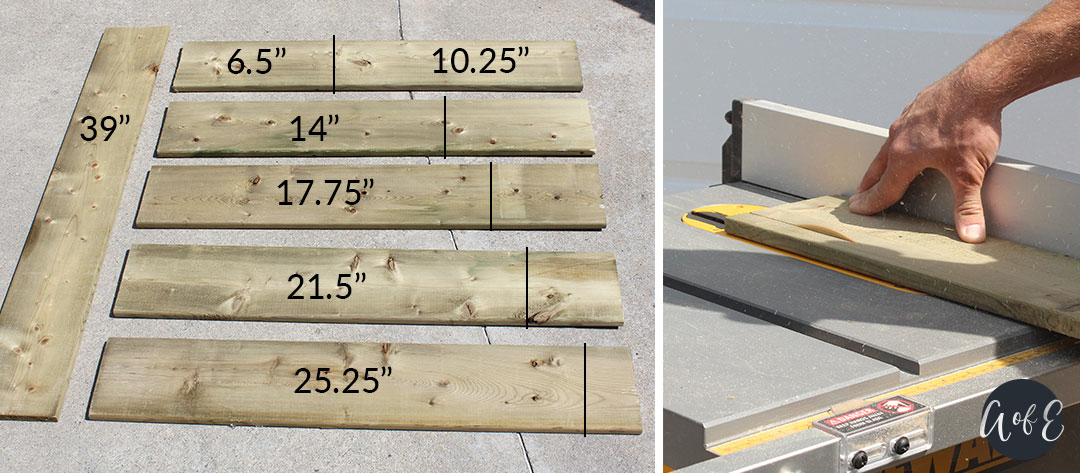
6 Pieces of Wood – I used leftover fence boards. You will cut them in a range of sizes from 6.5″ to 25.25″ for the horizontal pieces of the tree and 39″ for the vertical piece of wood.
12 Nails or 6 Screws
Drill
Hammer/Screwdriver
Saw
Stain/Paint – MINWAX Wood Finish stain in the colour “Classic Grey”
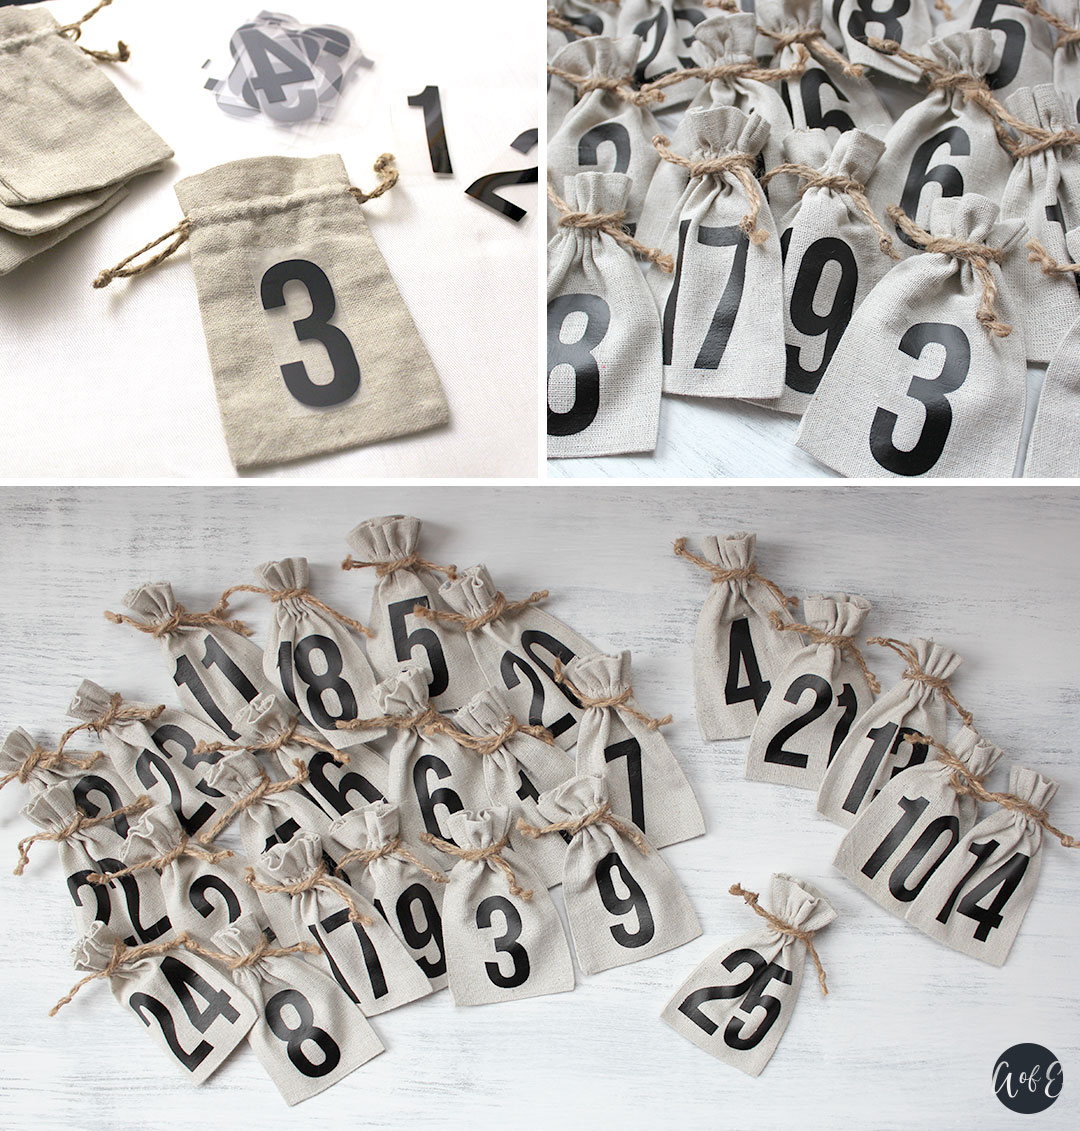
25 Small bags – I used 3” x 4” Canvas Bags from Creative Bag
25 Eyelet’s or Small Hooks – I used eyelets and then opened them to make hooks
Tags or Iron On Vinyl – If using vinyl, you will need a vinyl-cutting machine. I used Iron-on vinyl from Michaels
Tree topper – Canadian Tire
Step 1: Measure and Cut Your Wood Pieces
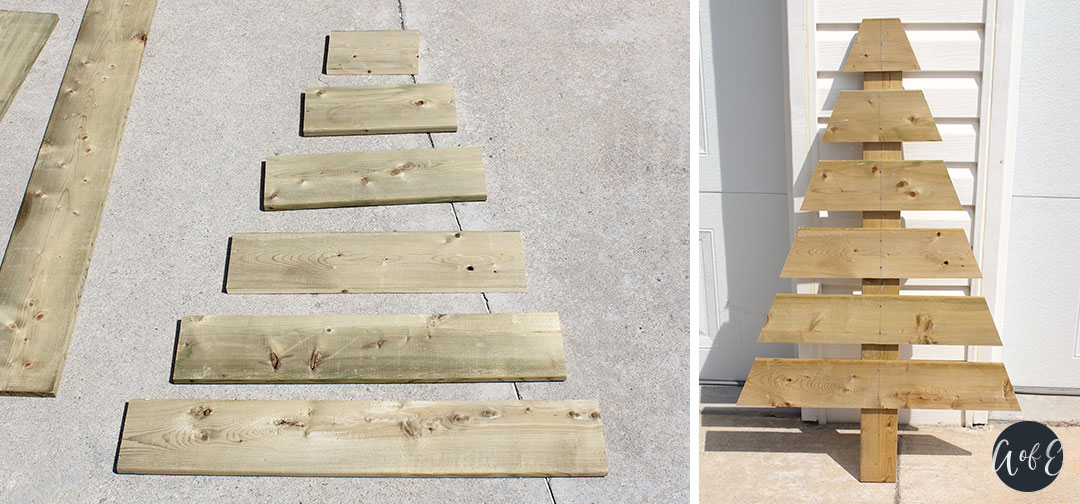
You will need 6 horizontal pieces and 1 vertical piece of wood. I used fence boards that were a little too wide for my liking so I trimmed them down from 5.5” to be 4.25” wide. Starting with your horizontal pieces of wood; cut 6 different sizes in length: 6.5”, 10.25”, 14”, 17.75”, 21.5” and 25.25”. Cut your vertical piece of wood so it is 39” tall. The vertical piece will be used as the tree truck for your advent calendar.
Step 2: Cut Angles and Nail Wooden Boards Together In a Tree Form.
Cut the ends of your horizontal wood pieces on a 22.5-degree angle inwards (See photo). Take your horizontal pieces of wood and nail them to your vertical piece of wood starting with the smallest piece to the largest piece. I used 2 nails in each board, but you can use 1 screw instead if you’d prefer (Personally, I prefer the rustic look of nails). I would suggest placing the horizontal boards on first and figuring out where you would like them to sit before nailing them to the vertical board. Take into consideration how tall you want your tree trunk to be at the bottom. I left a 1.5” gap between each horizontal piece of wood.
Step 3: Stain/Paint Wooden Tree
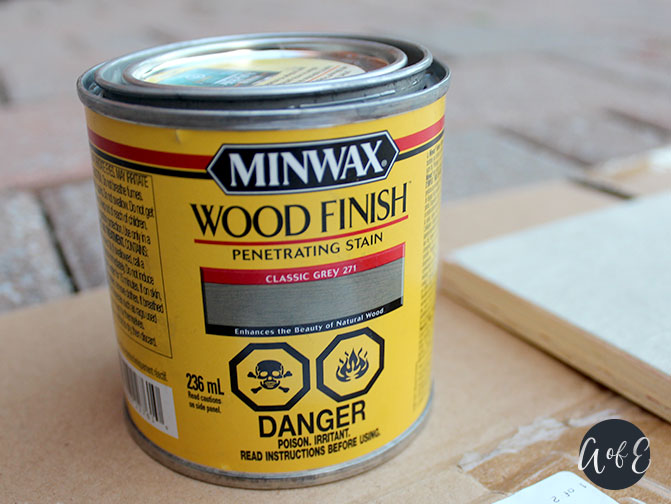
Stain or paint your wooden tree. I stained my wooden tree with MINWAX Wood Finish stain in the colour “Classic Grey”. Apply the stain in thin layers so it doesn’t get too dark. I used two coats of stain.
Step 4: Screw Hooks into Wooden Tree
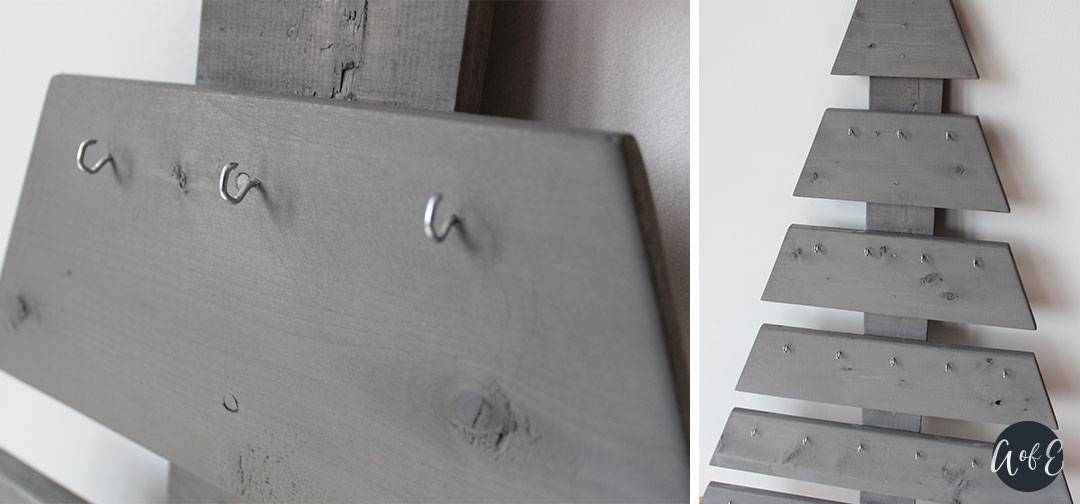
Screw hooks into your wooden tree to hang your advent calendar bags off of. I couldn’t find any hooks small enough so I used small eyelets and then opened them up to make my own hooks. Equally space the hooks on each horizontal board. I suggest penciling where you would like the hooks to go and then pre-drill the holes so the hooks screw in easily. Do not screw any hooks into the smallest horizontal board unless you prefer not to have a tree topper on your advent calendar. I wanted a star on my advent calendar so I left the top horizontal board hook-free.
If you plan to have 25 advent days on your calendar like I do, then the hooks go in the following order:
1st Board – No Hooks
2nd Board – 3 Hooks
3rd Board – 4 Hooks
4th Board – 5 Hooks
5th Board – 6 Hooks
6th Board – 7 Hooks
Step 5: Attach a Tree Topper
This step will vary depending on the type of tree topper you choose. The tree topper star I used was purchased at Canadian Tire. To attach the grapevine star to the top of my tree, I put a nail into the smallest horizontal board that had no hooks on it and hung the star from it. My star was made out of wire so it was easy to simply hang it on the nail. You could also glue the star to the top of the tree depending on the type of tree topper.
Step 6: Apply Numbers to Canvas Bags
Apply numbers to each advent bag. I wanted this advent calendar to be a bit more masculine for Brent so I used heat transfer vinyl and my Cricut to create these basic numbers. I cut the numbers 1 through 25 out with my Cricut vinyl-cutting machine and then ironed them onto each canvas bag. If you do not have a vinyl machine, you can use tags or paint the numbers on yourself.
Step 7: Fill Each Day with Goodies and Hang on Advent Calendar
The Best Part! Fill each advent bag with goodies and hang them onto the wooden tree advent calendar. If you wrap the drawstrings around the hook before tying it, it should hang nicely on the hook.
I’ve seen some pretty sweet advent calendars on the Internet lately for wine lovers, lipstick lovers and even funky sock lovers so don’t be afraid to have some fun with it and switch it up from the traditional chocolate!


No Comments