

I love Christmas and getting festive! The more Christmas decorations the better!
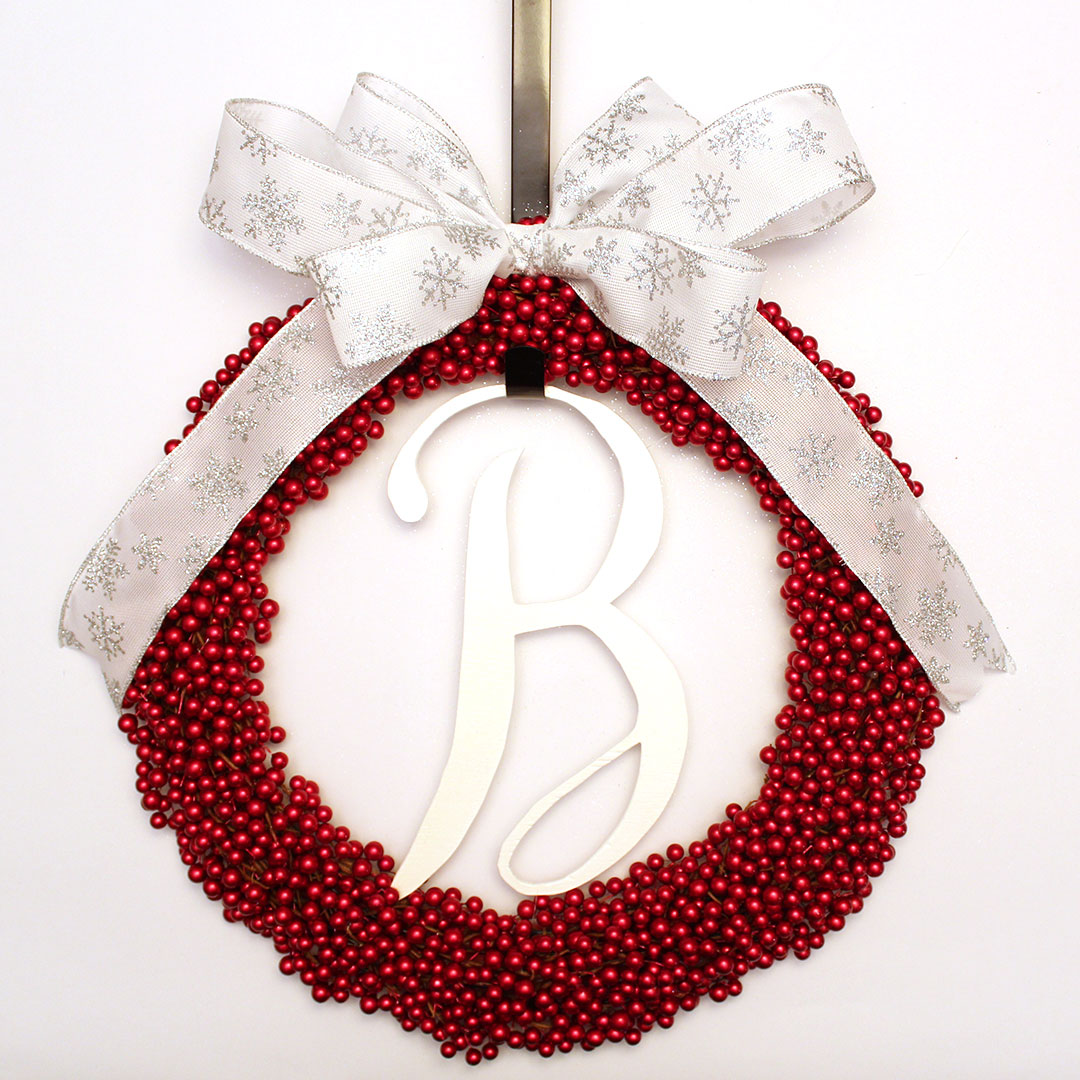
Christmas wreaths are a great way to add that festive touch to the outside of your home. After searching in stores and online (Etsy.com) for a Christmas wreath I started to realize just how expensive they can be. If you’re looking for something large and full of decorations, your looking to spend anywhere from $60-$110. Want it personalized for your family? Ya that’s going to cost you an arm and a leg. Not in my budget. So why not make one for a quarter of the cost!
Here’s my tutorial for how to make a cute affordable Christmas wreath.

What You Will Need:
Ribbon – Thicker is better
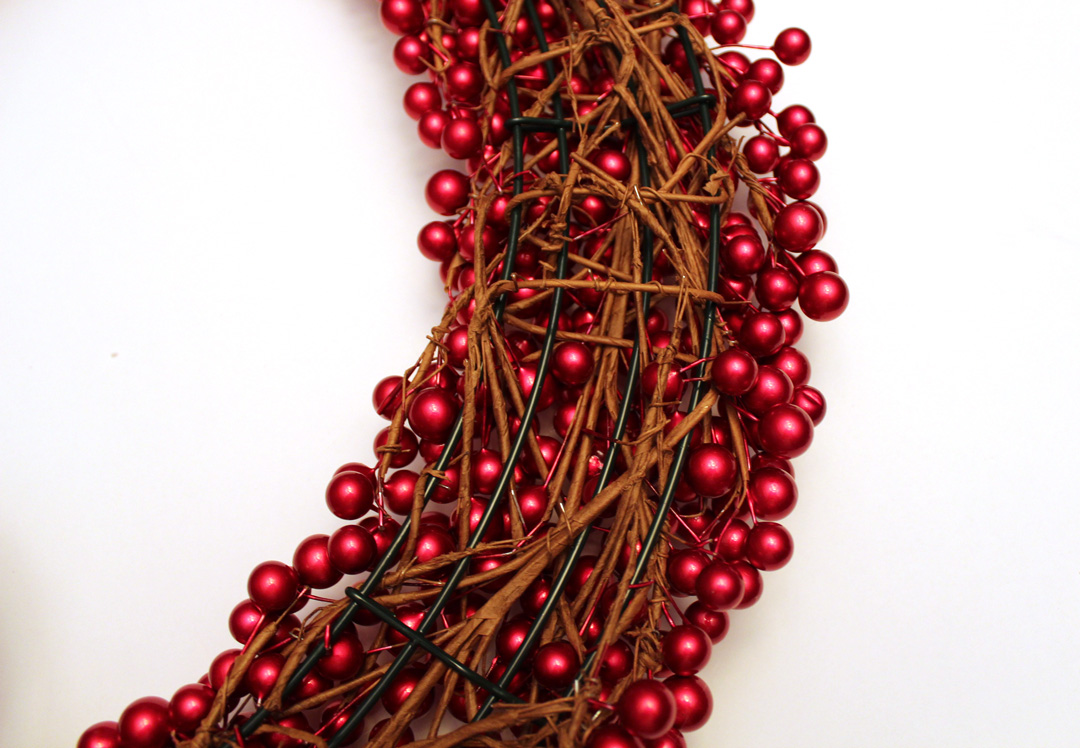
Red pearl stems – I used about 30 of these
Foam pieces – To cover the back of your wreath
Wire wreath frame – I used an 18″ frame
Wood – Thin so it’s not too heavy or bypass this and buy a wooden letter from Michaels Craft Store
Glue gun
Fishing line
Graphite transfer paper
Paint
Mod Podge
Wreath Hook
Twist Ties
Great! Let’s Start
Step 1:
Before you begin adding your red pearls, trace the circle wire frame onto your foam. This will be your backing. It is much easier to trace the circle without the beads already on it. My foam wasn’t big enough therefore I had to use two pieces and glue them together. Cut this circle you’ve just traced out and save for later.

Now onto the wreath!
Start by wrapping the wired red pearl stems around and through the wreath. Make sure to really twist it so that it will not fall off. I wrapped the stem around the frame and then also wrapped some of the red pearl beads around for extra security.
Keep adding more until your happy with the density of your wreath. I wanted my wreath to be very dense so this step took a while but don’t worry it’s the hardest part of this project – everything else is easy peasy!

My finished pearls looked something like this! SO MANY RED PEARLS!
Make sure your red pearls are twisted around other red pearls to keep them connected! Once my wreath was starting to get full I stripped the beads off the large stem and began gluing/twisting them around the other pearls to make the wreath thicker.
Step 2:
The back of your wreath will probably be very sharp from the wire. To avoid it from scratching your door we are going to add a foam backing. You should have this cut out already from the first step. Glue this circle onto the back of your wreath using hot glue.

Once you’re done this step your wreath is done! YAY! Now onto the wooden letter….
Step 3:
You can buy a wooden letter from Michaels instead of cutting one out yourself. Large wooden letters are about $8 so that’s not too bad. I’m cheap though and wanted to use a piece of wood I’ve had lying around. Plus then you can be fancy and create your own letter compared to the Michaels standard font.
The best way to make a wooden letter is to first print out the letter you want in the size you want it to be. I created mine smaller then the 18″ wreath so that it would fit inside the inner circle ring (that’s about 16″ in height). After you print it out use graphite transfer paper to trace your letter onto the wood. You can buy graphite transfer paper at most craft stores. I got mine from Curry’s.
Once your letter is traced on and you’re happy with it, cut it out and then paint it. I used a regular white craft paint and then applied a couple coats of glossy Mod Podge. Mod Podge helps add shine and seal if for the wet conditions it will face outside.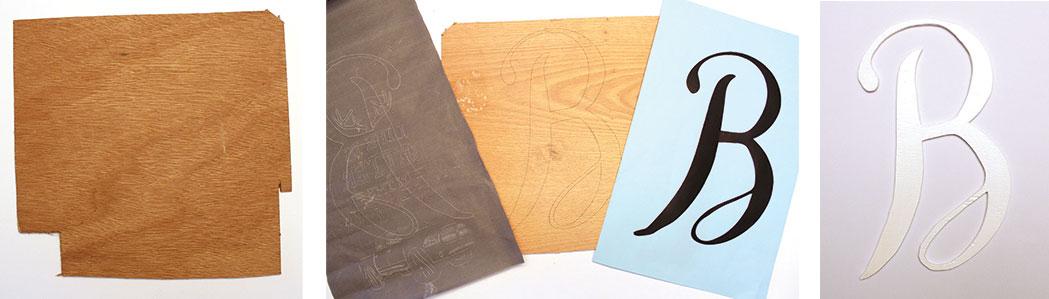
Next attach your letter to the wreath.
Step 4:
Fishing line is the easiest way to attach your letter because hot glue will most likely melt the red pearls (they are foam). This will take some patience to make sure it is perfectly centered. I suggest tying the top of your letter first and then tying the bottom. My wreath is so dense that I had to use tweezers to get the string through the berries to tie it.

Now lets make the bow!
Step 5:
Cut your desired length of ribbon and fold it like shown in the first image below. My motto is that you can always cut the ribbon shorter so it’s better to start with something long. Next pinch the bow in middle and tie off with a twist tie to create the bow “knot”. To make your bow bigger we are going to add a small bow on top.
Cut more of your ribbon and fold in half with the cut ends together. Place the cut ends on your twist tie “knot” and wrap another twist tie around to secure this small bow. If you’re following the pictures I also added a small bow at the back for additional height.
Now lets hide those ugly twist ties! Cut a small piece of ribbon and fold it in half hotdog style (vertically). Wrap this around the twist ties and hot glue it together on the back of your bow.
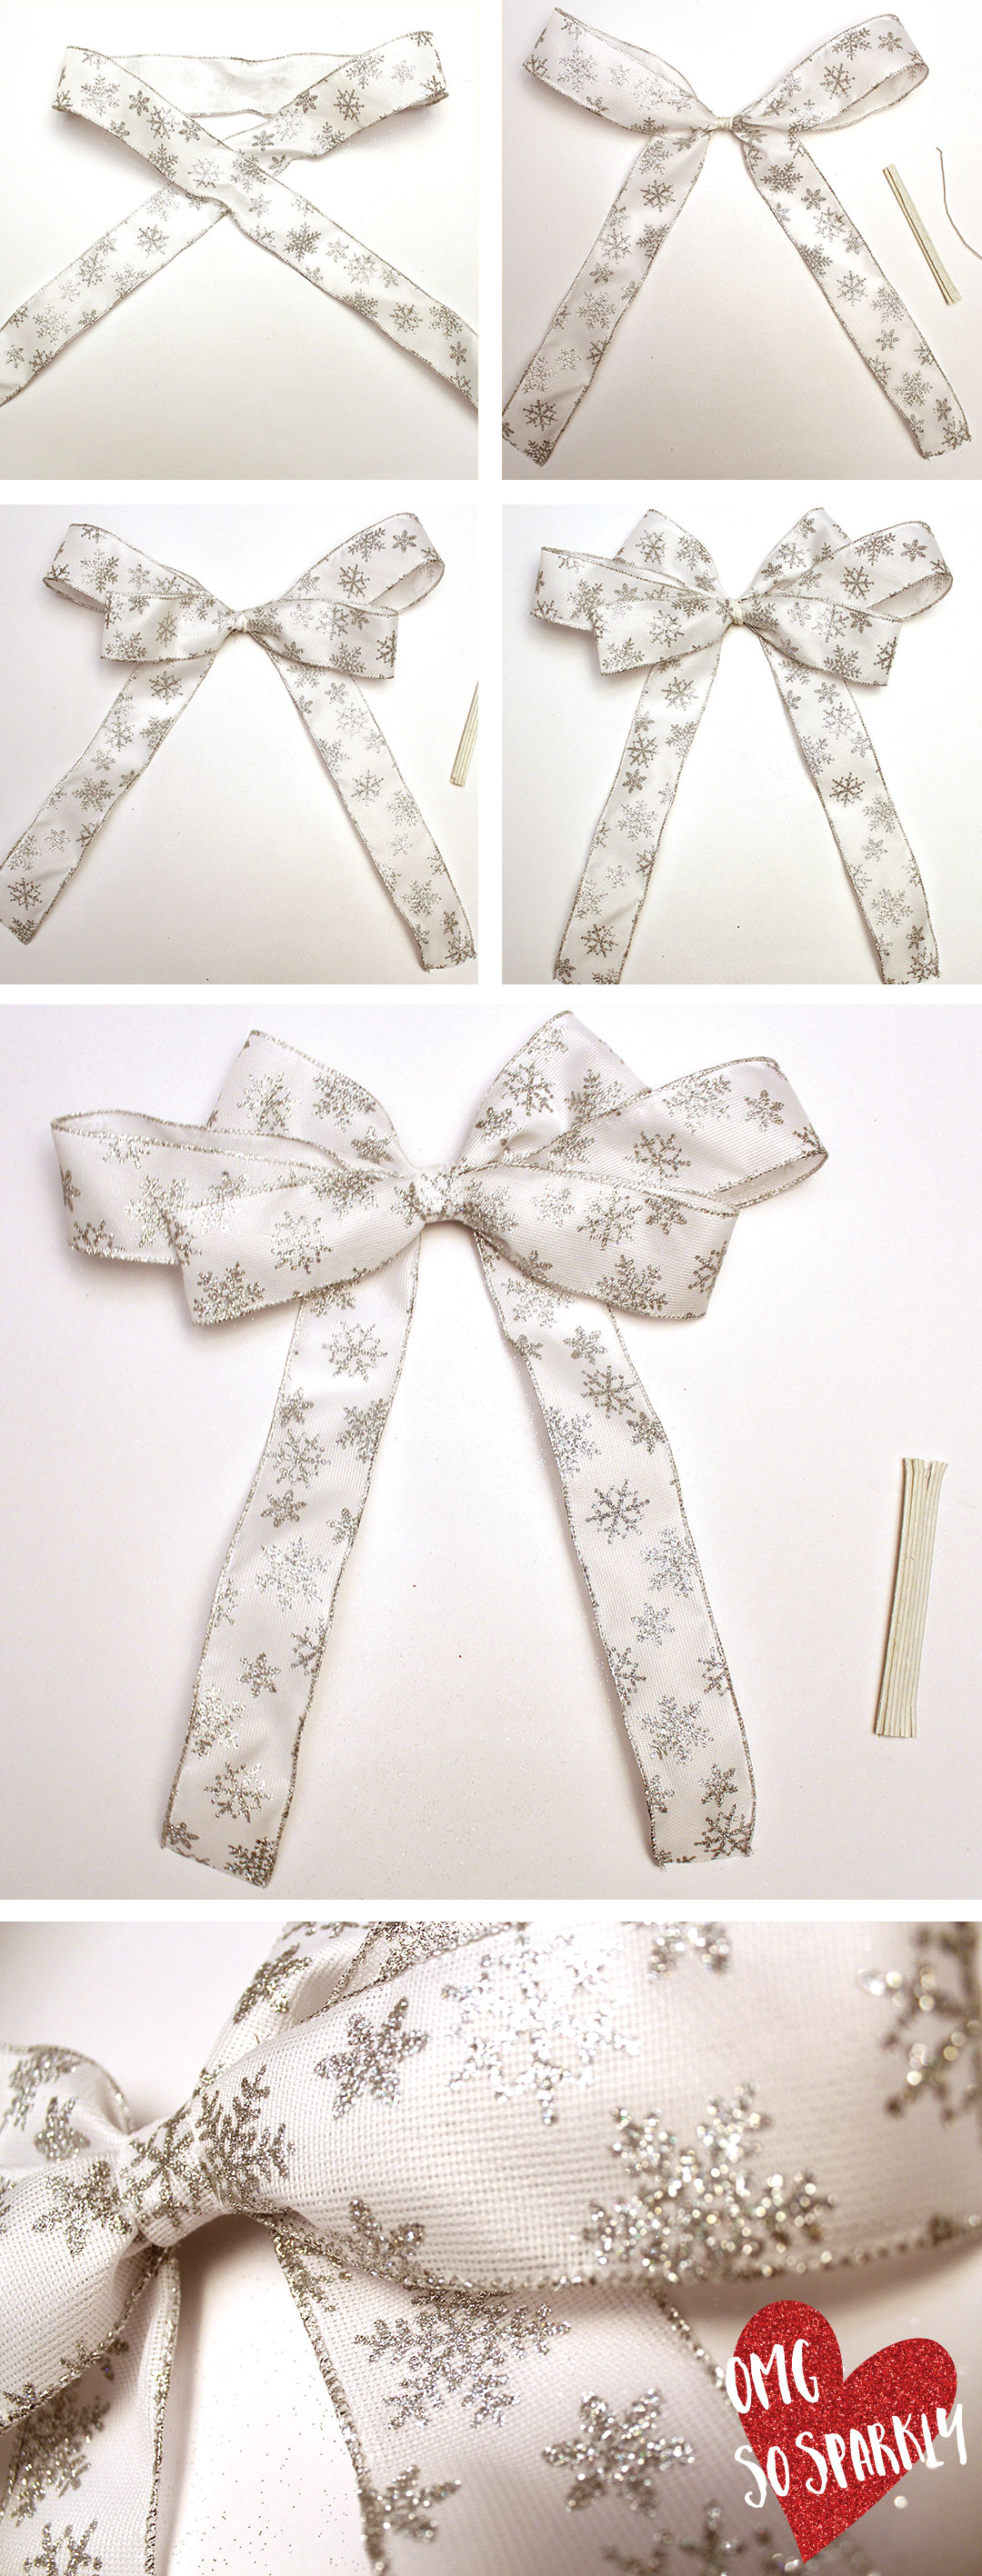
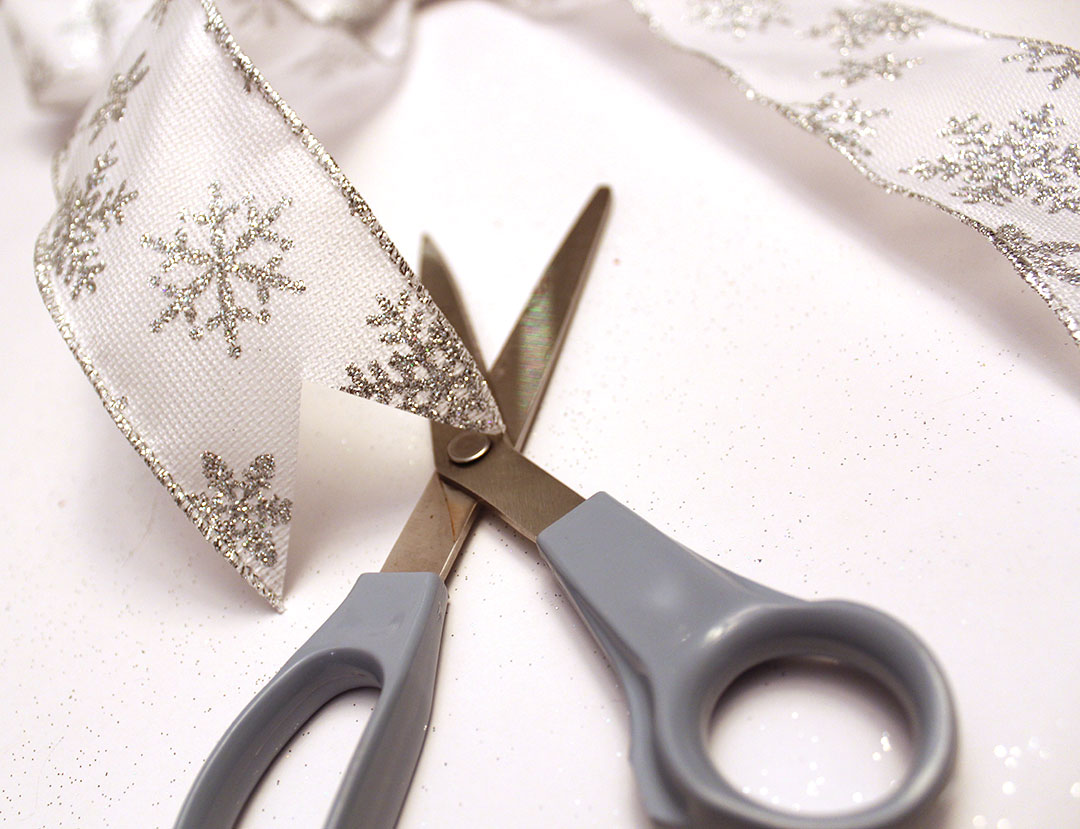
If you don’t like the square cut off look for the bottom of your bow ends; feel free to cut triangles out of each to make them pointed. I like the look of the pointed ends.
Sparkly bow completed!
Step 6, Last Step:
Hot glue your bow onto your wreath and you’re done!
Ain’t it PURRDDY!?


No Comments